Contents
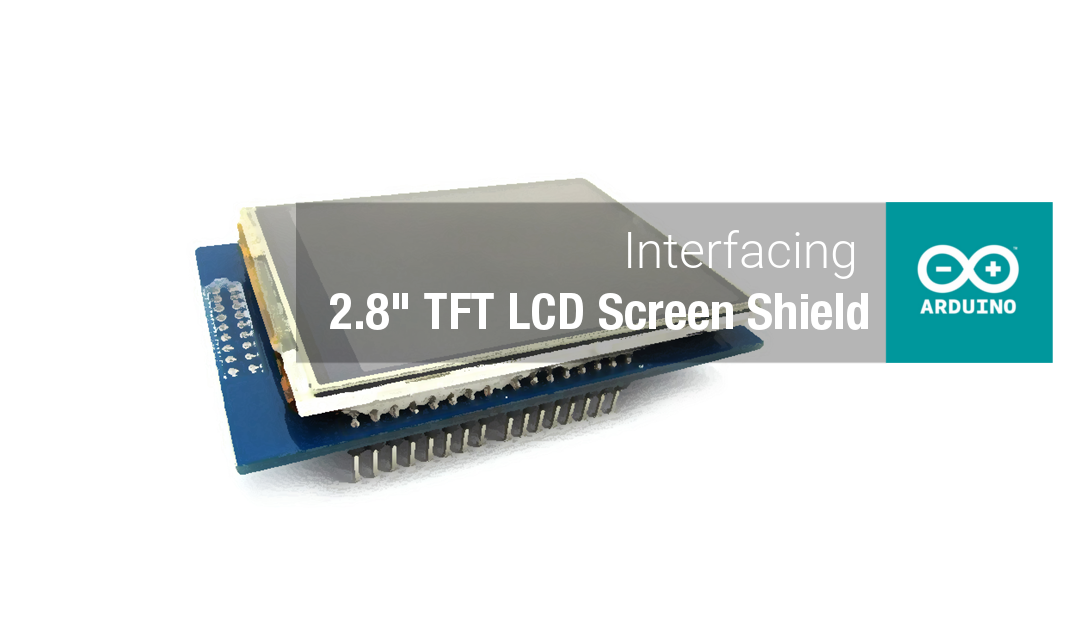
Looking for a bigger screen to interface with the Arduino Uno? Bigger than the 2.4″ TFT LCD screen, this shield is able to display a little more information than the 2.4″ screen. In this tutorial, we’ll be looking at how we would interface the 2.8″ TFT LCD Touchscreen Shield with an Arduino Uno.

Specifications
- 2.8″ diagonal LCD TFT display
- QVGA Resolution (240 X 320)
- Graphic Driver: IL9341
- MicroSD card slot
- 4-wire resistive touchscreen
- 8 bit digital interface, plus 4 control lines
- 4 white LED backlight
Connections
As this is an Arduino Shield, just attach the shield to the Arduino Board. (Uno, Mega, etc.) But in this tutorial, we’ll be connecting the shield to an Arduino Uno.
Libraries
We’ll be using Adafruit’s GFX and TFTLCD library to interface the LCD shield with Arduino Uno. Download the library, extract the rspective folders and place it in your Arduino libraries directory.
Adafruit GFX Library: https://github.com/adafruit/Adafruit-GFX-Library
Adafruit TFTLCD Library: https://github.com/adafruit/TFTLCD-Library
Calibration

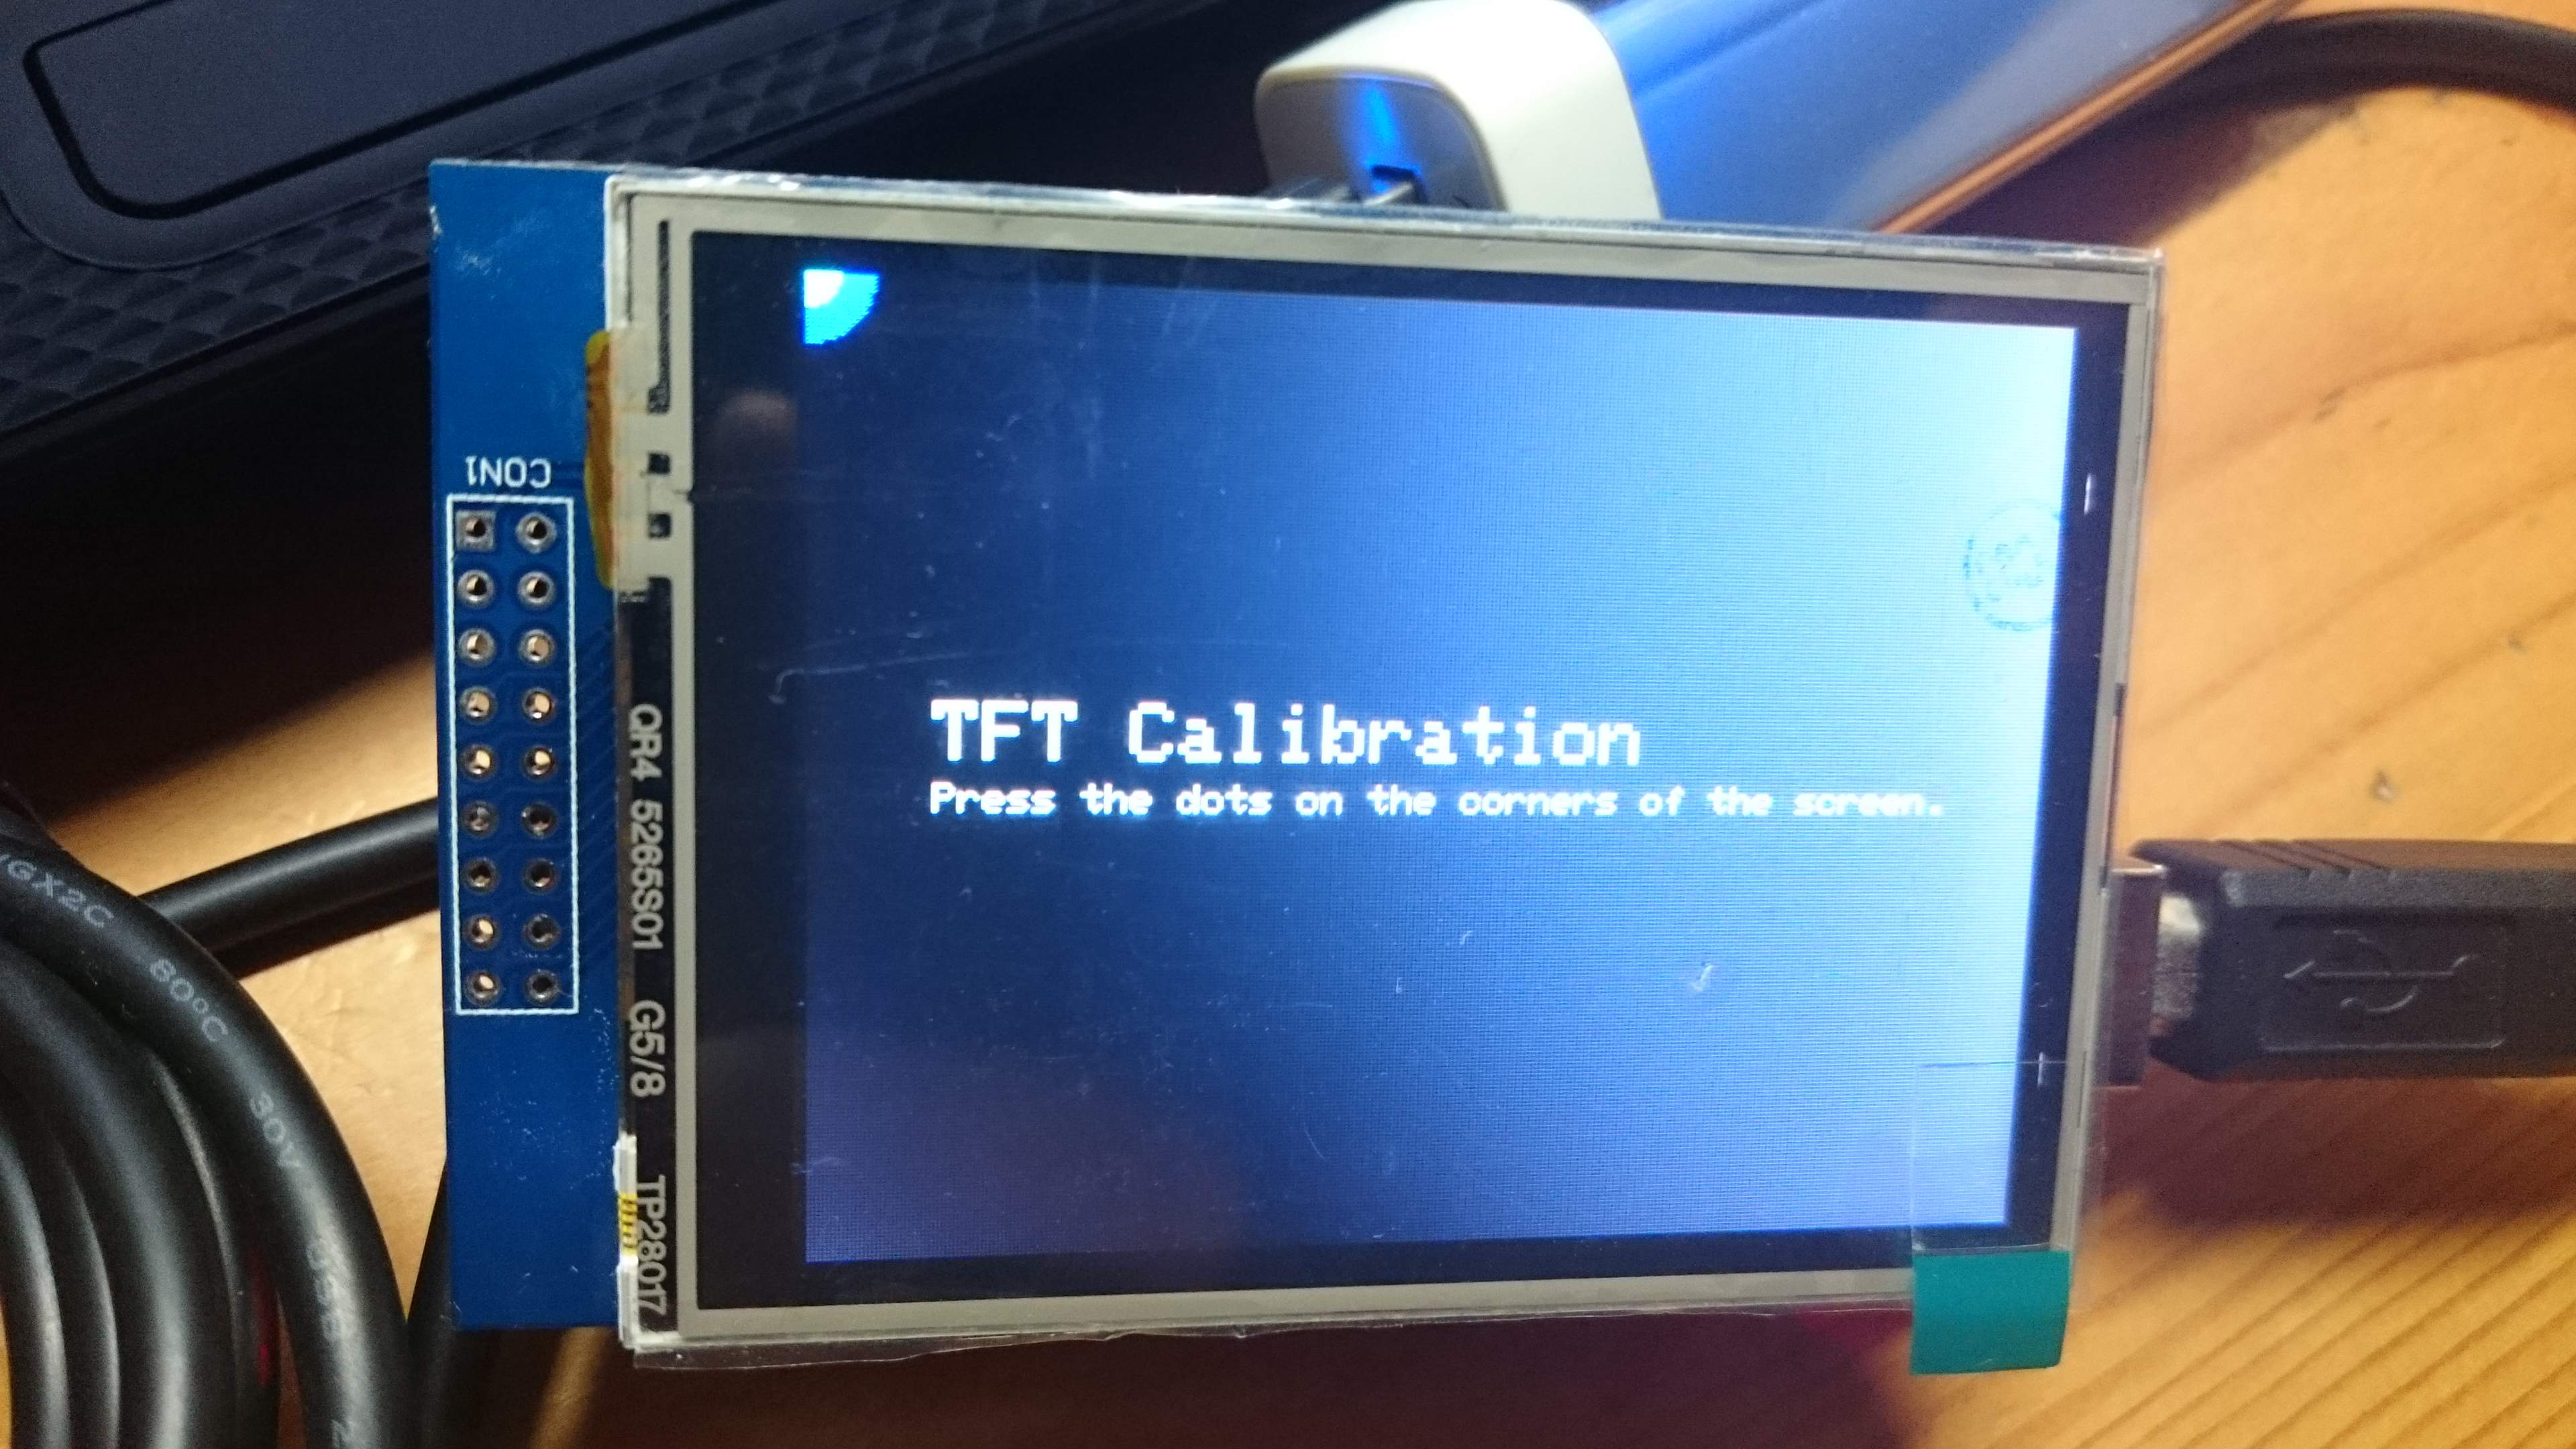
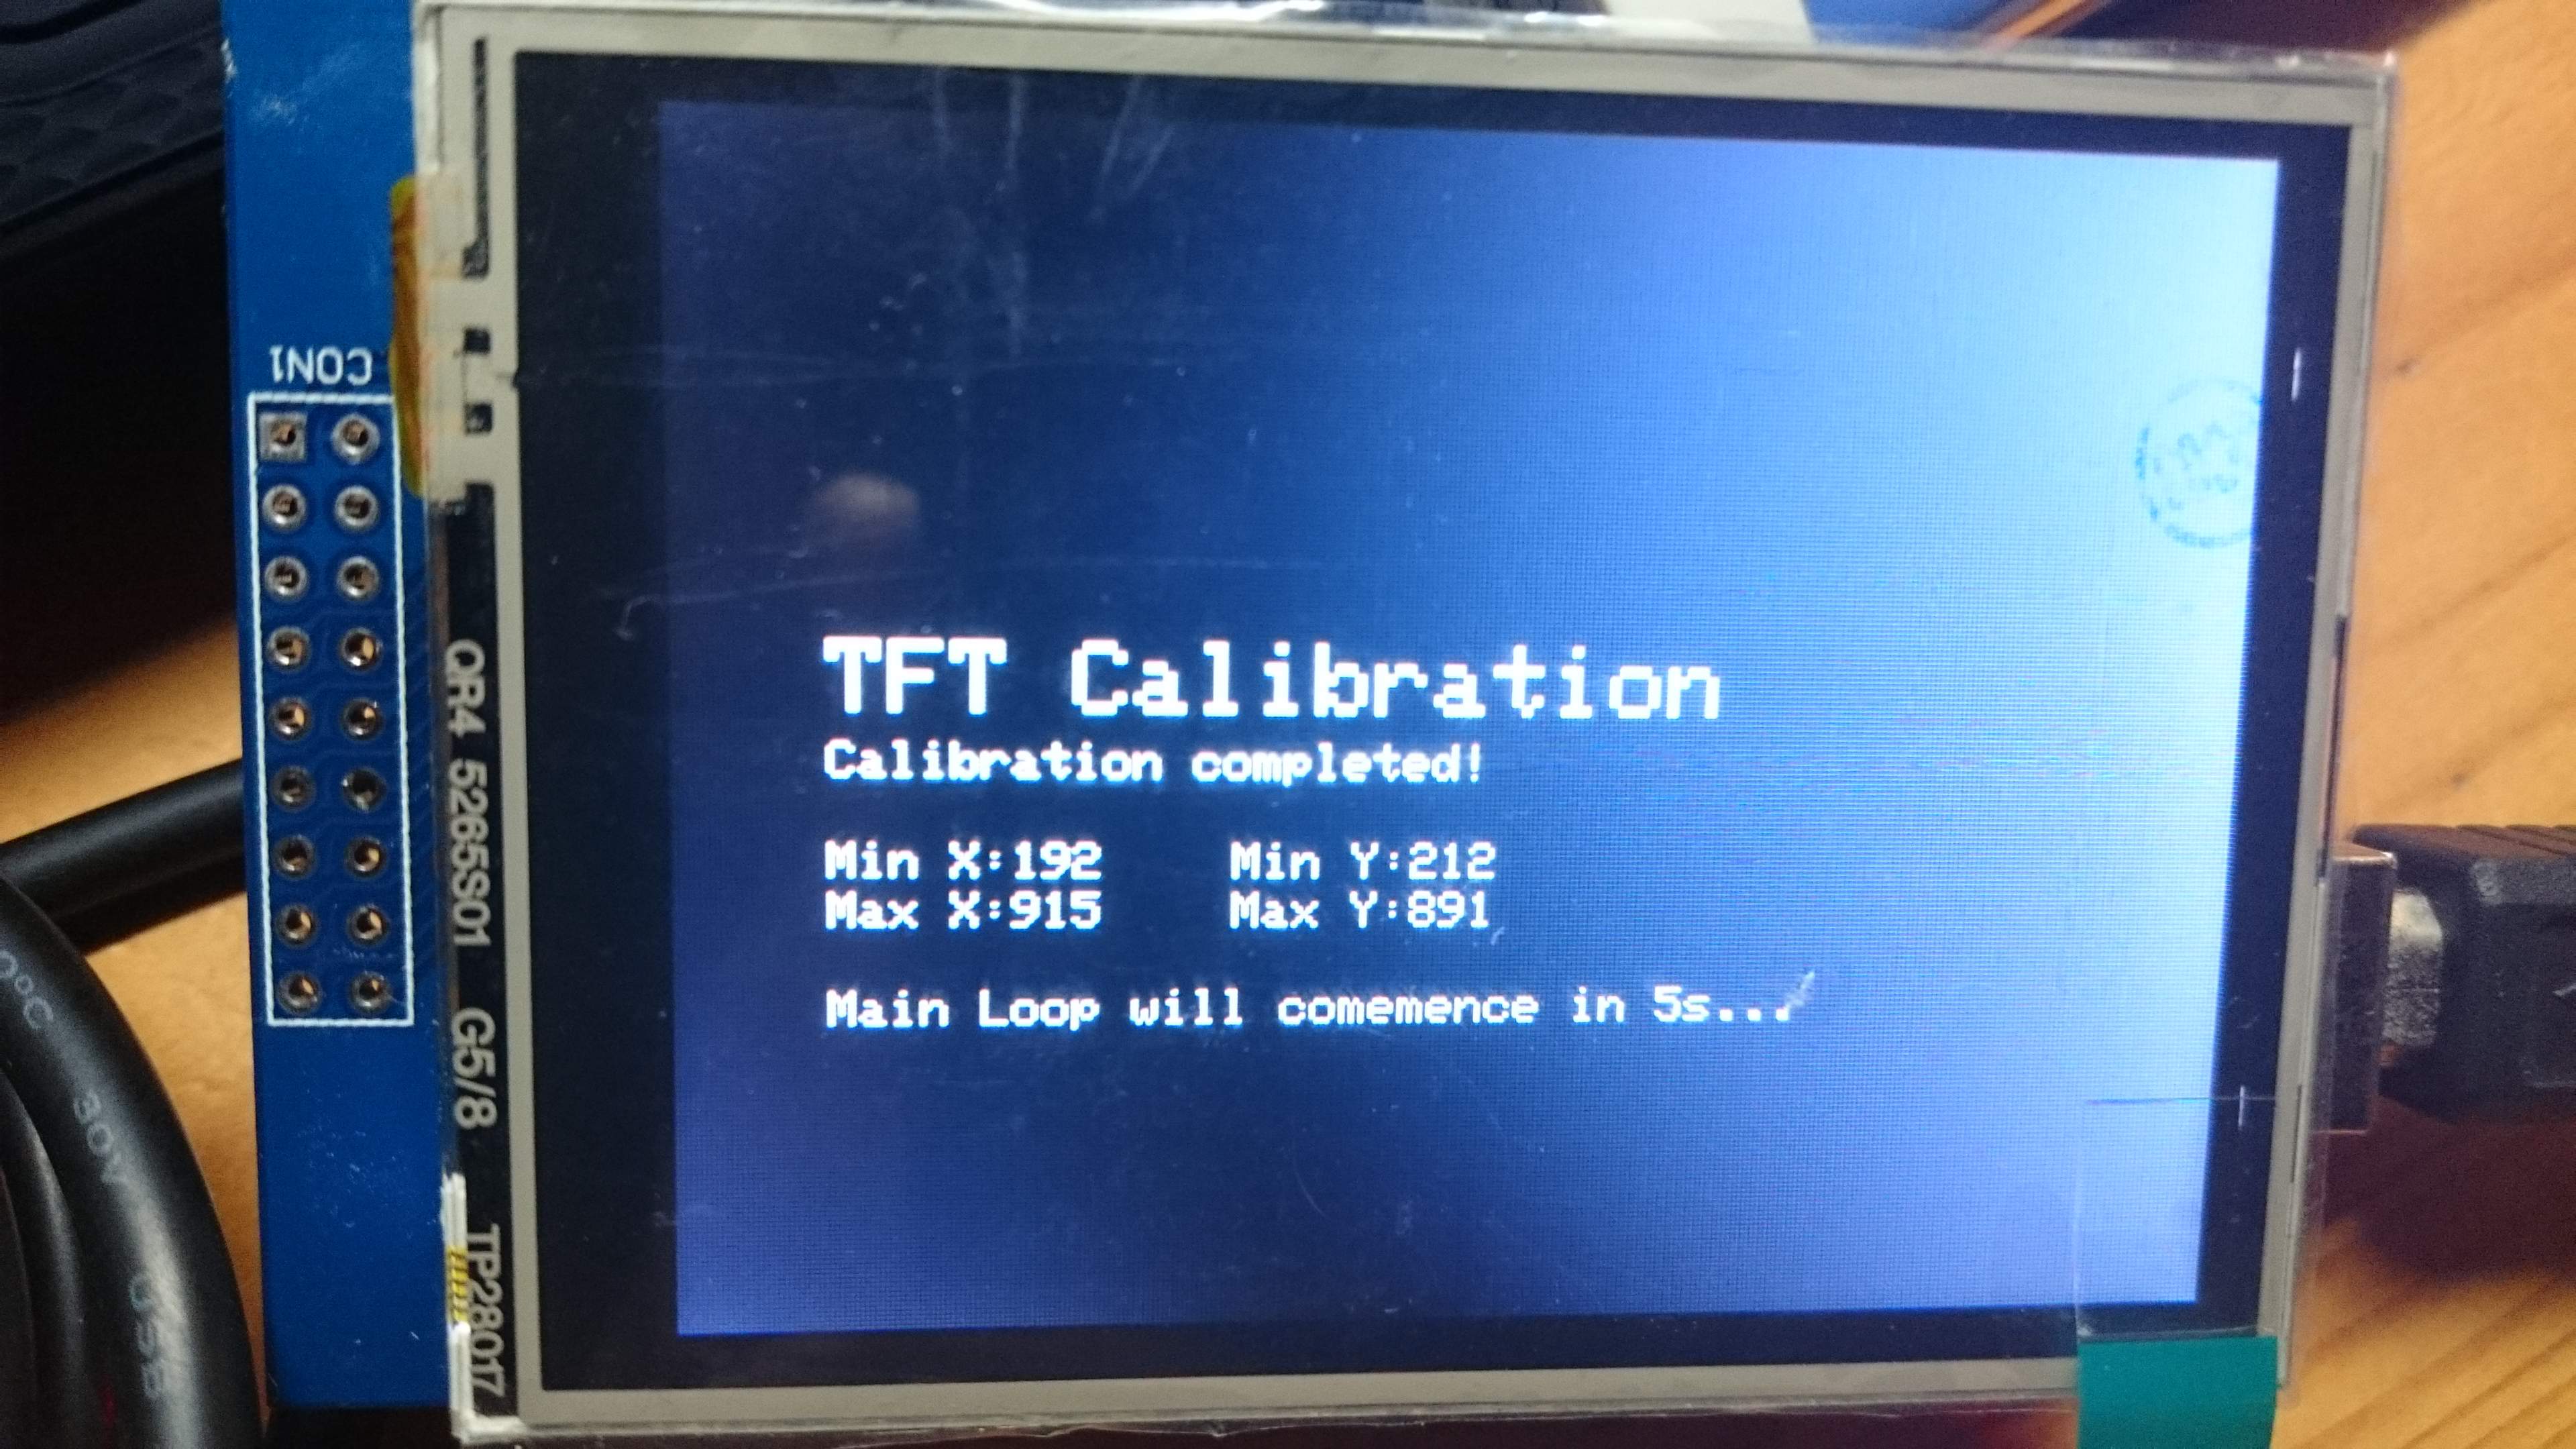
Before using the TFT LCD Shield, we should first calibrate the touch screen. As there weren’t any calibration sketch provided in the librarie’s example, I wrote a simple calibration sketch to calibrate the touch screen. With this sketch, adapted from Adafruit’s tftpaint example sketch, it will display the offset that will remap the values of the raw values of the TFT resistors to the coordinates of the screen.
Demo
Code
The values displayed at the end of the calibration will be used to determine the TS_MINX, TS_MINY, TS_MAXX & TS_MAXY variables. These variables are actually the resistance value of the TFT screen, which will be “converted” into coordinates relative to the screen:
p.x = map(p.x, TS_MINX, TS_MAXX, 0, tft.width());
p.y = map(p.y, TS_MINY, TS_MAXY, tft.height(), 0);
Upload the following code below to obtain the offset values. Remember to note down the respective values (TS_MINX, TS_MINY, TS_MAXX & TS_MAXY), as it is needed for the next section of the tutorial.
// Paint example specifically for the TFTLCD breakout board.
// DOES NOT CURRENTLY WORK ON ARDUINO LEONARDO

#include <Adafruit_GFX.h>    // Core graphics library
#include <Adafruit_TFTLCD.h> // Hardware-specific library
#include <TouchScreen.h>

#if defined(__SAM3X8E__)
#undef __FlashStringHelper::F(string_literal)
#define F(string_literal) string_literal
#endif

#define YP A3  // must be an analog pin, use "An" notation!
#define XM A2 // must be an analog pin, use "An" notation!
#define YM 9   // can be a digital pin
#define XP 8   // can be a digital pin

// For better pressure precision, we need to know the resistance
// between X+ and X- Use any multimeter to read it
// For the one we're using, its 300 ohms across the X plate
TouchScreen ts = TouchScreen(XP, YP, XM, YM, 300);

#define LCD_CS A3
#define LCD_CD A2
#define LCD_WR A1
#define LCD_RD A0
// optional
#define LCD_RESET A4

// Assign human-readable names to some common 16-bit color values:
#define  BLACK   0x0000
#define BLUE    0x001F
#define CYAN    0x07FF
#define WHITE   0xFFFF

Adafruit_TFTLCD tft(LCD_CS, LCD_CD, LCD_WR, LCD_RD, LCD_RESET);

#define PENRADIUS 3
#define MINPRESSURE 10
#define MAXPRESSURE 1000

int count = 0;

int TS_MINX = 500;
int TS_MINY = 500;
int TS_MAXX = 0;
int TS_MAXY = 0;

bool tft_y = false;

void setup(void) {
  Serial.begin(9600);
  Serial.println(F("TFT Calibration"));

  tft.reset();

  //The identifier is hardcoded as the library is unable to recognise the lcd chip
  uint16_t identifier = 0x9341;

  tft.begin(identifier);
  pinMode(13, OUTPUT);
  tft.fillScreen(BLACK);

  //Splash
  tft.setRotation(1);
  tft.setCursor(30, (tft.height() / 2) - 20);
  tft.setTextSize(2);
  tft.println("TFT Calibration v1.0");
  tft.setCursor(30, tft.height() / 2);
  tft.setTextSize(1);
  tft.setTextColor(WHITE);
  tft.print("Screen size:");
  tft.print(tft.width());
  tft.print("x");
  tft.println(tft.height());
  tft.setCursor(30, (tft.height() / 2) + 20);
  tft.println("Test wil begin in 2s...");
  delay(2000);
  tft.fillScreen(BLACK);
  //TFT Calibration
  tft.setCursor(30, (tft.height() / 2) - 20);
  tft.setTextSize(2);
  tft.println("TFT Calibration");
  tft.setCursor(30, (tft.height() / 2));
  tft.setTextSize(1);
  tft.setTextColor(WHITE);
  tft.print("Click on screen to begin...");
  tft_y = true;
}

void drawCir(int prevX, int prevY, int x, int y) {
  tft.fillCircle(prevX, prevY, 15, BLACK);
  tft.fillCircle(x, y, 15, BLUE);
  tft.fillCircle(x, y, 7, CYAN);
}

void loop()
{
  digitalWrite(13, HIGH);
  TSPoint p = ts.getPoint();
  digitalWrite(13, LOW);
  // if sharing pins, you'll need to fix the directions of the touchscreen pins
  pinMode(XM, OUTPUT);
  pinMode(YP, OUTPUT);

  if (tft_y) {
    if (p.z > MINPRESSURE && p.z < MAXPRESSURE) {
      debugPt(p);
      Serial.print("tCount = "); Serial.println(count);

      switch (count) {
        case 0:
          tft.fillRect(30, (tft.height() / 2), 180, (tft.height() / 2) + 10, BLACK);
          tft.setCursor(30, (tft.height() / 2));
          tft.print("Press the dots on the corners of the screen.");
          drawCir(0, 0, 0, 0);
          getMinMax(p);
          count++;
          break;
        case 1:
          drawCir(0, 0, tft.width(), 0);
          getMinMax(p);
          count++;
          break;
        case 2:
          drawCir(tft.width(), 0, tft.width(), tft.height());
          getMinMax(p);
          count++;
          break;
        case 3:
          drawCir(tft.width(), tft.height(), 0, tft.height());
          getMinMax(p);
          count++;
          break;
        case 4:
          Serial.print("nMin X = "); Serial.print(TS_MINX);
          Serial.print("Min Y = "); Serial.print(TS_MINY);
          drawCir(0, tft.height(), tft.width() + 16, tft.height() + 16);
          tft.fillRect(30, (tft.height() / 2), 300, (tft.height() / 2) + 10, BLACK);
          tft.setCursor(30, tft.height() / 2);
          tft.print("Calibration completed!");
          tft.setCursor(30, (tft.height() / 2) + 20);
          tft.print("Min X:");
          tft.print(TS_MINX);
          tft.setCursor(110, (tft.height() / 2) + 20);
          tft.print("Min Y:");
          tft.print(TS_MINY);
          tft.setCursor(30, (tft.height() / 2) + 30);
          tft.print("Max X:");
          tft.print(TS_MAXX);
          tft.setCursor(110, (tft.height() / 2) + 30);
          tft.print("Max Y:");
          tft.print(TS_MAXY);
          tft.setCursor(30, (tft.height() / 2) + 50);
          tft.print("Main Loop will comemence in 5s...");
          delay(5000);
          tft_y = false;
          break;
      }
      delay(200);
    }
  } else {
    tft.setRotation(0);

    if (p.z > MINPRESSURE && p.z < MAXPRESSURE) {
      p.x = map(p.x, TS_MINX, TS_MAXX, 0, tft.width());
      p.y = map(p.y, TS_MINY, TS_MAXY, tft.height(), 0);
      tft.fillCircle(p.x, p.y, PENRADIUS, BLUE);
    }
  }
}

void debugPt(TSPoint pt) {
  Serial.print("nX = "); Serial.print(pt.x);
  Serial.print("tY = "); Serial.print(pt.y);
  Serial.print("tPressure = "); Serial.print(pt.z);
}


void getMinMax(TSPoint pt) {
  if (pt.x < TS_MINX) {
    TS_MINX = pt.x;
  }
  if (pt.y < TS_MINY) {
    TS_MINY = pt.y;
  }
  if (pt.x > TS_MAXX) {
    TS_MAXX = pt.x;
  }
  if (pt.y > TS_MAXY) {
    TS_MAXY = pt.y;
  }
}

void drawTestScreen() {
  tft.setCursor(tft.width() / 2, tft.height() / 2);
  tft.setTextSize(1);
  tft.setTextColor(WHITE);
  tft.print("Screen size:");
  tft.print(tft.width());
  tft.print("x");
  tft.println(tft.height());

  tft.println("Calibration");
  tft.println("-------------------");
  tft.println("Press on the dot to begin");
}
Paint Demo – Adjustments
After the calibration is done and the (maximum & minimum) X/Y resistance values recorded, we’ll proceed on to running the tftpaint demo. Open up tftpaint sketch from Adafruit’s TFTLCD examples.

Before uploading the code into Arduino, there are a few changes that needs to be done.
Touchscreen Constants
Replace the following constants with the values you have obtained from the calibration sketch, which is loacted at around line 51. So for example, if your values are:
- Min X: 192
- Min Y: 212
- Max X: 915
- Max Y: 891
Change the default constant values from:
#define TS_MINX 150
#define TS_MINY 120
#define TS_MAXX 920
#define TS_MAXY 940
to
#define TS_MINX 192
#define TS_MINY 212
#define TS_MAXX 915
#define TS_MAXY 891
Remapping
When you draw something on the touch screen with the original sketch, the X coordinates will be inverted. To fix it, we’ll have to flip the mapping function from :
// scale from 0->1023 to tft.width
p.x = map(p.x, TS_MINX, TS_MAXX, tft.width(), 0);
p.y = map(p.y, TS_MINY, TS_MAXY, tft.height(), 0);
to
// scale from 0->1023 to tft.width
p.x = map(p.x, TS_MINX, TS_MAXX, 0, tft.width() );
p.y = map(p.y, TS_MINY, TS_MAXY, tft.height(), 0);
Upload
After the changes has been made, save the sketch and upload to the Arduino. And Viola! You should be able to draw on the screen without too much offset.
Troubleshooting
The screen is blank/filled with noise!
Open up your serial monitor & see whther the library is able to detect the driver. If the Serial Monitor returns something like this:
Unknown LCD driver chip: 0x00
You can try hard-coding the driver of the LCD Shield specific to the shield you have. You can figure it through these following methods:
- Turn to the back of the shield & look for the chip ID
- Trying out all the possible IDs available in the TFTLCD Library one by one
After you have figured out the driver ID, we’ll hard code the driver ID. Modify this line of code (at line 92) from this:
uint16_t identifier = tft.readID();

  if(identifier == 0x9325) {
    Serial.println(F("Found ILI9325 LCD driver"));
  } else if(identifier == 0x9328) {
    Serial.println(F("Found ILI9328 LCD driver"));
  } else if(identifier == 0x7575) {
    Serial.println(F("Found HX8347G LCD driver"));
  } else if(identifier == 0x9341) {
    Serial.println(F("Found ILI9341 LCD driver"));
  } else if(identifier == 0x8357) {
    Serial.println(F("Found HX8357D LCD driver"));
  } else {
    Serial.print(F("Unknown LCD driver chip: "));
    Serial.println(identifier, HEX);
    Serial.println(F("If using the Adafruit 2.8" TFT Arduino shield, the line:"));
    Serial.println(F("  #define USE_ADAFRUIT_SHIELD_PINOUT"));
    Serial.println(F("should appear in the library header (Adafruit_TFT.h)."));
    Serial.println(F("If using the breakout board, it should NOT be #defined!"));
    Serial.println(F("Also if using the breakout, double-check that all wiring"));
    Serial.println(F("matches the tutorial."));
    return;
  }
to this:
uint16_t identifier = 0x9341;