Contents
Touted as the successor of the current Gazebo robot simulator (which is commonly used alongside with ROS), we’ll be exploring how to install Ignition Gazebo and the few features it has in this tutorial. With that, let’s begin!
What is Ignition Gazebo?
Ignition is a collection of open source robotics simulation libraries & cloud services for individuals and organizations to simulate or test robots in various scenarios and environment virtually. Although Ignition is still in developments and not all the features have been ported or implemented, it would eventually replace Gazebo in the future. We’ll be looking at Ignition Citadel, which is released on December 2019 as a LTS (long Term Support) version.
Features
Not all the plugins have been ported over from Gazebo, here are some of the new features that Ignition has implemented currently:
- Thermal Camera Sensor
- Joint State Publisher
- Color scheme and themes customization
- Widgets can be moved around, resized & configured
- Load Plugins via Ignition itself
More information can be found in their website & here.
Prerequisites
We’ll be setting up Ignition on Ubuntu 18.04 along side ROS melodic. The following prerequisites are recommended before commencing on the tutorial.
- Ubuntu Bionic Beaver 18.04 (Or variants of it)
- ROS Melodic Morenia (Desktop Version)
- Experience with
- Linux Terminal Commands
- ROS
Xubuntu (a variant of Ubuntu) is recommended for it’s light Desktop environment.
Ensure that rosdep is installed!
Setup
Ignition Citadel
As the binary version of Ignition Citadel is available in the osrfoundation repository, we could just download the packages via apt. Before that, we’ll have to add the repo URL and the hash key. (To verify and ensure that the binaries and packages have not been tampered with)
$ sudo sh -c 'echo "deb http://packages.osrfoundation.org/gazebo/ubuntu-stable `lsb_release -cs` main" > /etc/apt/sources.list.d/gazebo-stable.list'
$ wget http://packages.osrfoundation.org/gazebo.key -O - | sudo apt-key add -
After that, update the repository list and install Ignition.
$ sudo apt update
$ sudo apt install ignition-citadel
After that, we’ll be setting up the packages required for Ignition – ROS integration & communication.
ROS Integration (ros_ign_bridge)
This package is to provide a way for Ignition and ROS to communicate together (as a network bridge). As the compiled binaries are unavailable at the time of writing, we would have to compile from source. The following dependencies are required:
- ros-melodic-rqt-image-view
- libignition-common3-dev
- libignition-msgs5-devlib
- ignition-transport8-dev
$ sudo apt install ros-melodic-rqt-image-view libignition-common3-dev libignition-transport8-dev libignition-msgs5-dev
After that, create a workspace called ign_bridge_ws in the home directory (~/) & clone the melodic branch of the ros_ign_bridge repository into the workspace.
$ mkdir -p ign_bridge_ws/src
$ cd ign_bridge_ws/src
$ git clone https://github.com/osrf/ros_ign.git -b melodic
Return to the parent directory (ign_bridge_ws) and install the following dependencies:
$ cd ..
$ rosdep install --from-paths src -i -y --rosdistro melodic \
  --skip-keys=ignition-gazebo2 \
  --skip-keys=ignition-gazebo3 \
  --skip-keys=ignition-msgs4 \
  --skip-keys=ignition-msgs5 \
  --skip-keys=ignition-rendering2 \
  --skip-keys=ignition-rendering3 \
  --skip-keys=ignition-sensors2 \
  --skip-keys=ignition-sensors3 \
  --skip-keys=ignition-transport7 \
  --skip-keys=ignition-transport8
Once all is done, we can compile & install into the workspace. We would also source the setup.bash to tell the system where ros_ign_bridge is located.
$ catkin_make install
$ sudo source ~/ign_bridge_ws/install/setup.bash
Alternatively, you can append it to .bashrc so that you do not need to always source the script before using it.
$ echo "source ~/ign_bridge_ws/install/setup.bash" >> ~/.bashrc
Running Ignition
To run ignition gazebo, you can start it through the Terminal console.
ign gazebo [SDF file]
For example, to run the shape demo (shapes.sdf), we could do so via the following command shown below. This would launch the Gazebo server and Gazebo GUI with a world that contains three simple shapes.
$ ign gazebo actor.sdf
To display more information (such as the error, warning, informational & debugging messages), a -v 4 could be appened to the back of the command.
$ ign gazebo actor.sdf -v 4
There are a few interesting demos to try out that comes with Ignition simulator, which includes:
actor.sdf
Demo of person performing various actions and walking around.
quadcopter.sdf
Demo of Quadcopter with ignition::gazebo::systems::MulticopterMotorModel plugin.
To go straight up, set speed to 700 to all 4 motors:
$ ign topic -t /X3/gazebo/command/motor_speed --msgtype ignition.msgs.Actuators -p 'velocity:[700, 700, 700, 700]'
lights.sdf
Demo of various kind of lights.

But more of these examples can be found in the usr/share/ignition/ignition-gazebo3/worlds directory. 
Note: If Ignition seems to be stuck or only a black screen is seen, the simulator might be downloading the necessary model(s) from their website. Give it sometime to download, after which it should eventually load.
Moving on, we would be trying out some examples on the ROS-Ignition Bridge communication.
Ignition – ROS integration Examples
Ensure that both ROS (
/opt/ros/melodic/setup.bash) & ign_bridge (~/ign_bridge_ws/install/setup.bash) has been sourced before hand.
Getting camera feed from Ignition
[Ignition -> ROS]
We’ll be opening a few terminal consoles to test out the examples:
Console 1
Let’s start with Ignition 1st by launching camera_sensor.sdf, with -r parameter to run/play the simulation once it has started:
$ ign gazebo -r camera_sensor.sdf
This example would run & publish the camera feed via /camera topic.
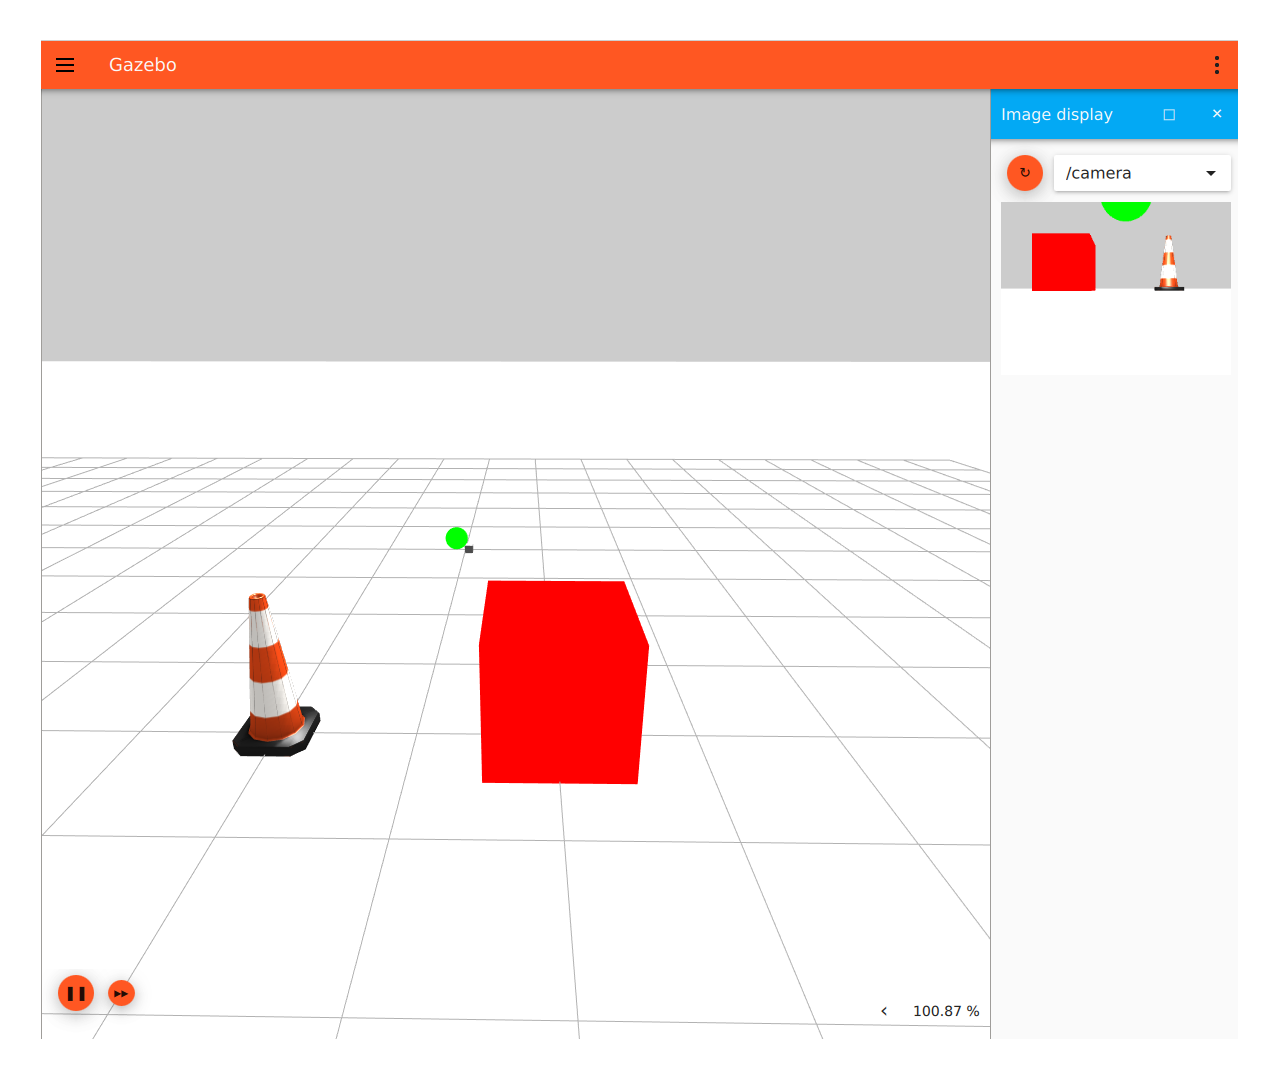
Press on the orange refresh button to display the camera view if it is blank/white.
Console 2
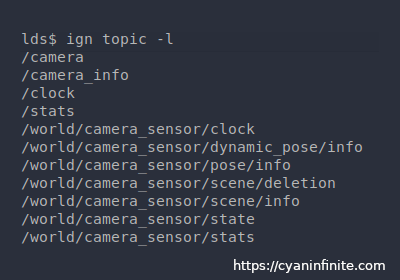
Opening a new console, we would check if the topic is being publishes. To do so, we can use the ign topic command:
$ ign topic -l
The /camera should be shown in the list.
Console 3
In a new console, we would run roscore:
$ roscore
Console 4
Opening another console, we would run ros_ign_bridge to bridge the communication to ROS:
$ rosrun ros_ign_bridge parameter_bridge /camera@sensor_msgs/[email protected]
Console 5
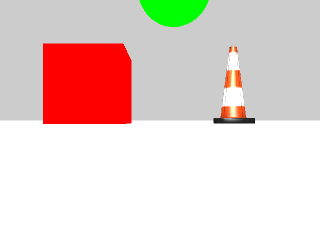
Opening the last console, we would display the image feed from the camera. To do so, we can use the rqt_image_view command:
$ rqt_image_view /camera
Ignition/ROS Talker & Listener
More examples could be found in the ros_ign_bridge repository:
https://github.com/ignitionrobotics/ros_ign/blob/melodic/ros_ign_bridge/README.md
References
Removing Ignition
To remove Ignition, it would be similar to removing regular ubuntu packages:
$ sudo apt purge ignition-citadel
$ sudo apt autoremove
Links
- https://ignitionrobotics.org/docs/citadel/install_ubuntu
- https://github.com/ignitionrobotics/ros_ign/blob/melodic/ros_ign_bridge/README.md