Contents
Recently, I bought a fingerprint sensor to use in my project and is useful as an alternative method for identity verification. For example, it could be used for opening doors, lock, safes and many more. Since I’m at it, I thought, “Why not make a simple tutorial on how to use it?” Therefore, I’d decided to write a simple tutorial on how to interface a fingerprint sensor with an Arduino.
Overview
This all-in-one optical fingerprint sensor powered by a high performance DSP chip, AS601. The chip does the image rendering, calculation and finger print recognition. This fingerprint sensor module uses serial UART, so it’s easy to link it up to the Arduino. We would be using the Adafruit fingerprint library to makes it easier to interface the module with the Arduino.
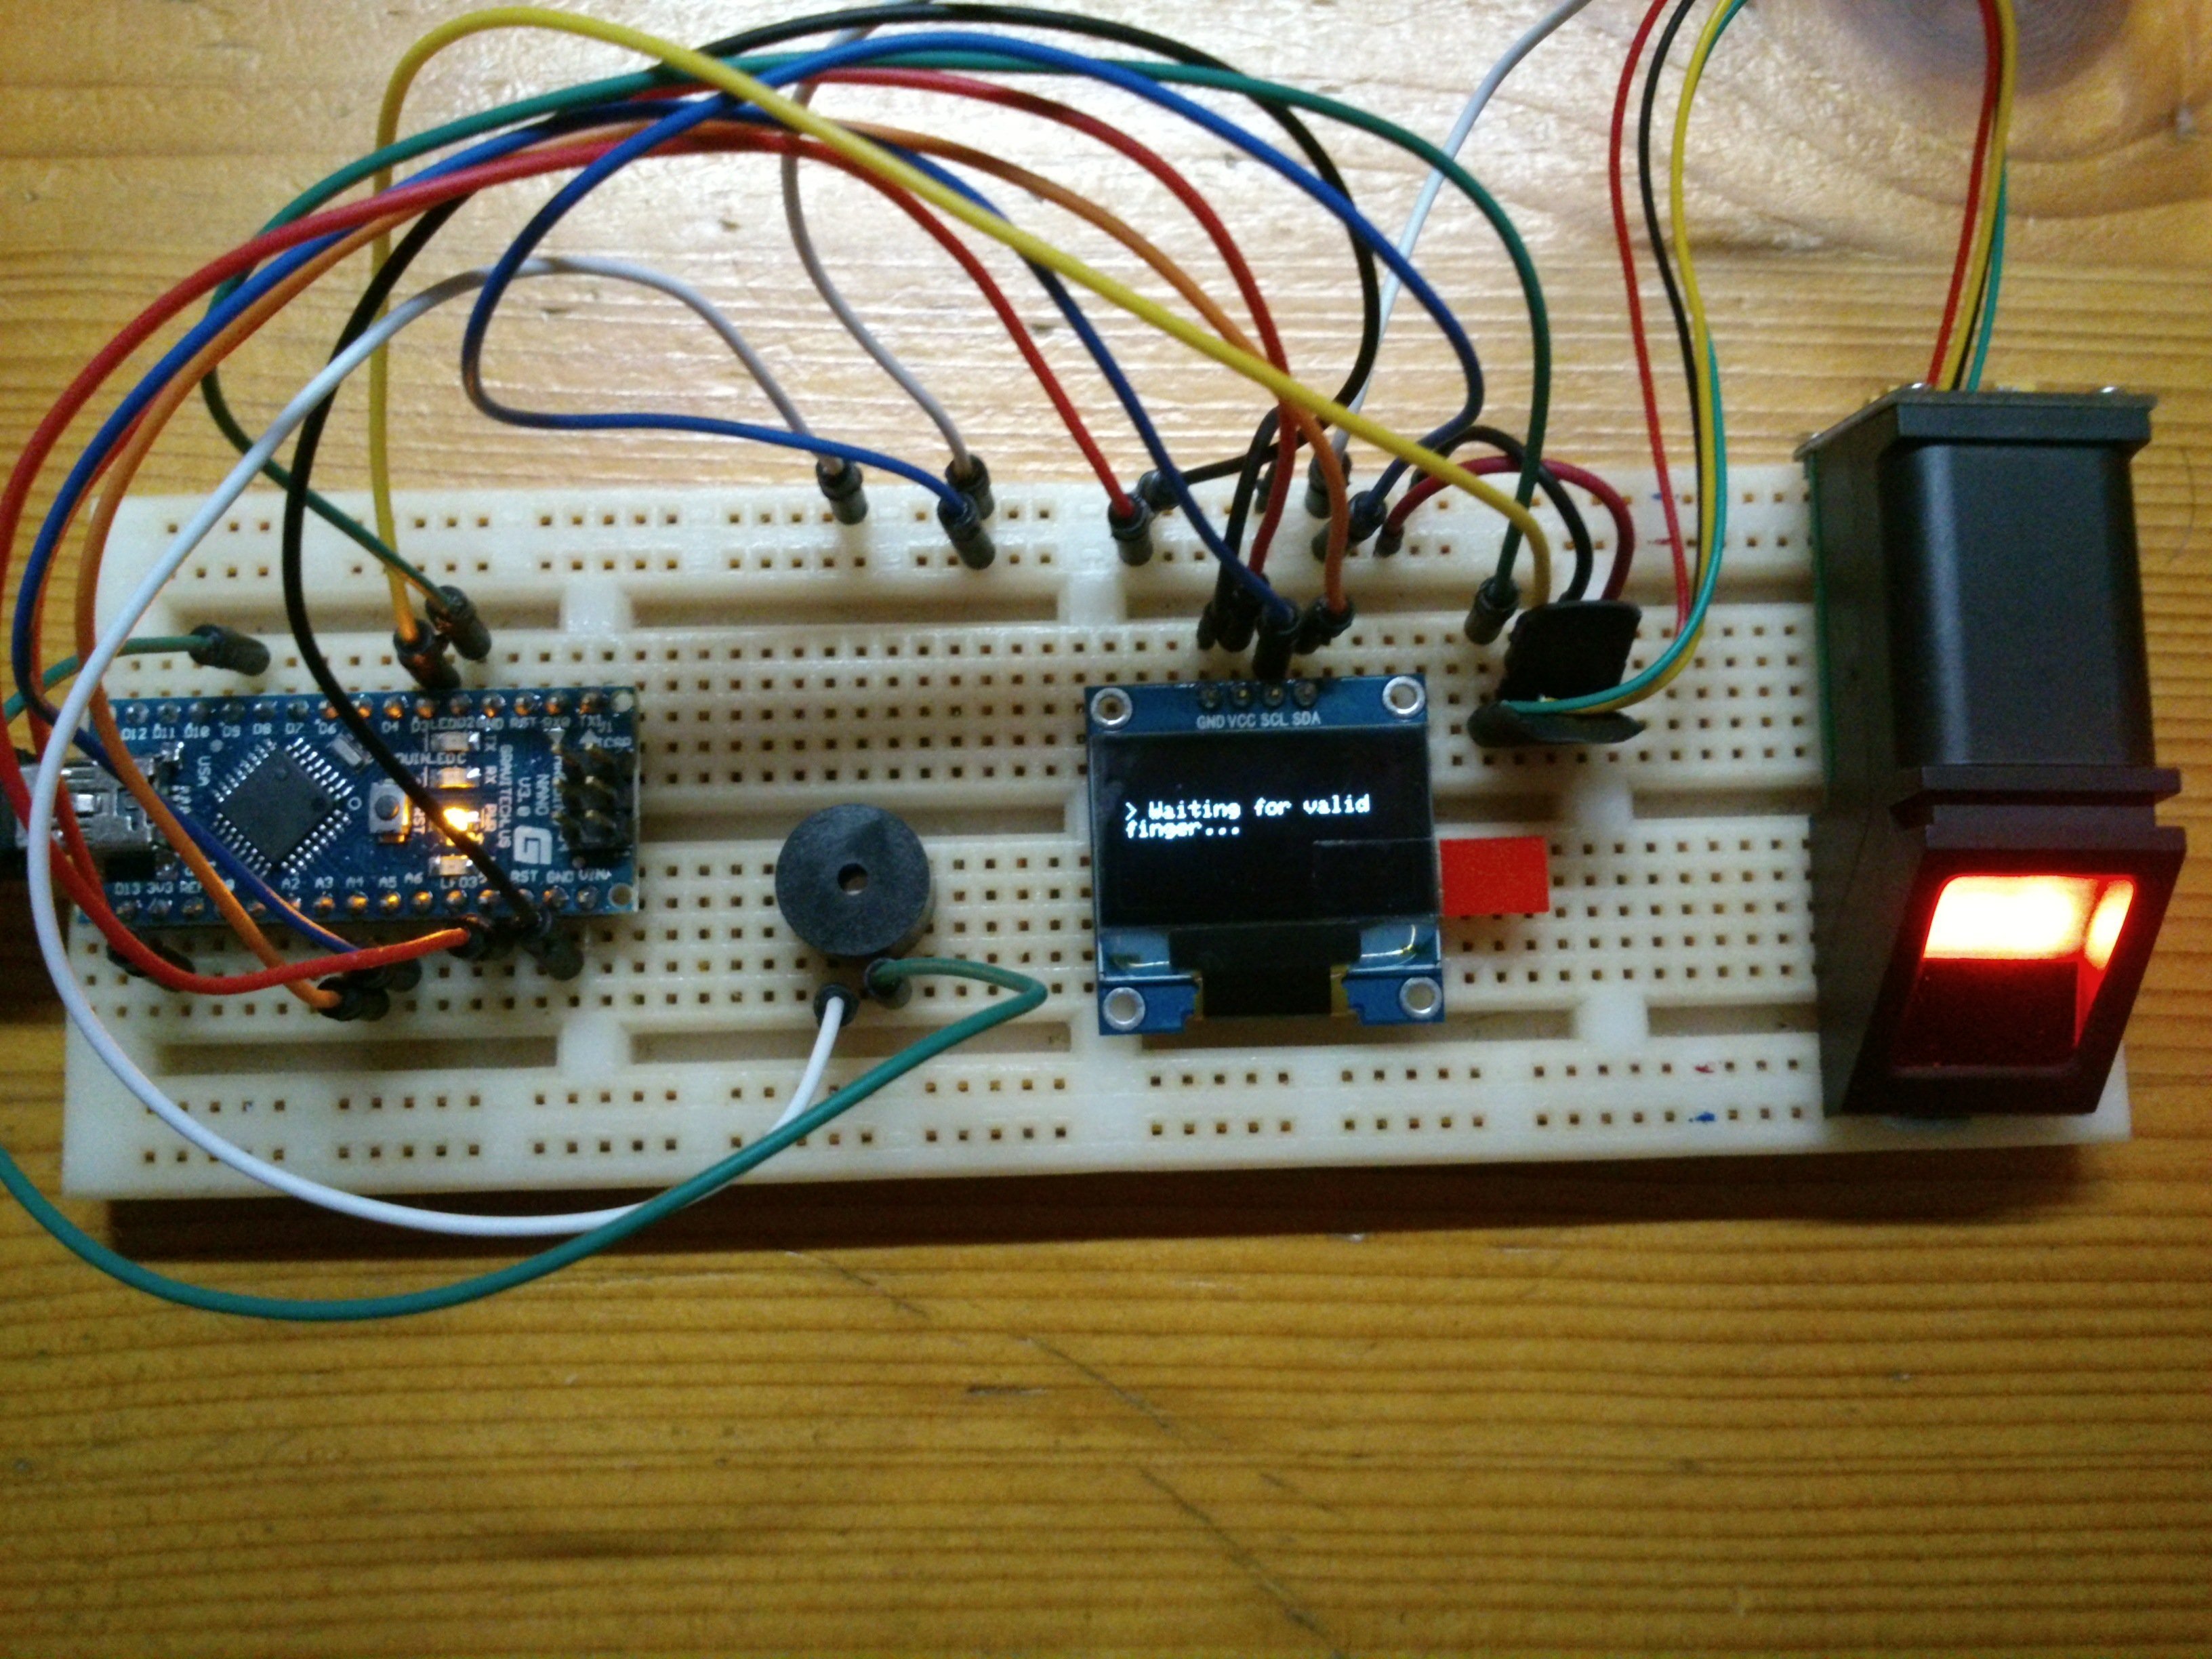
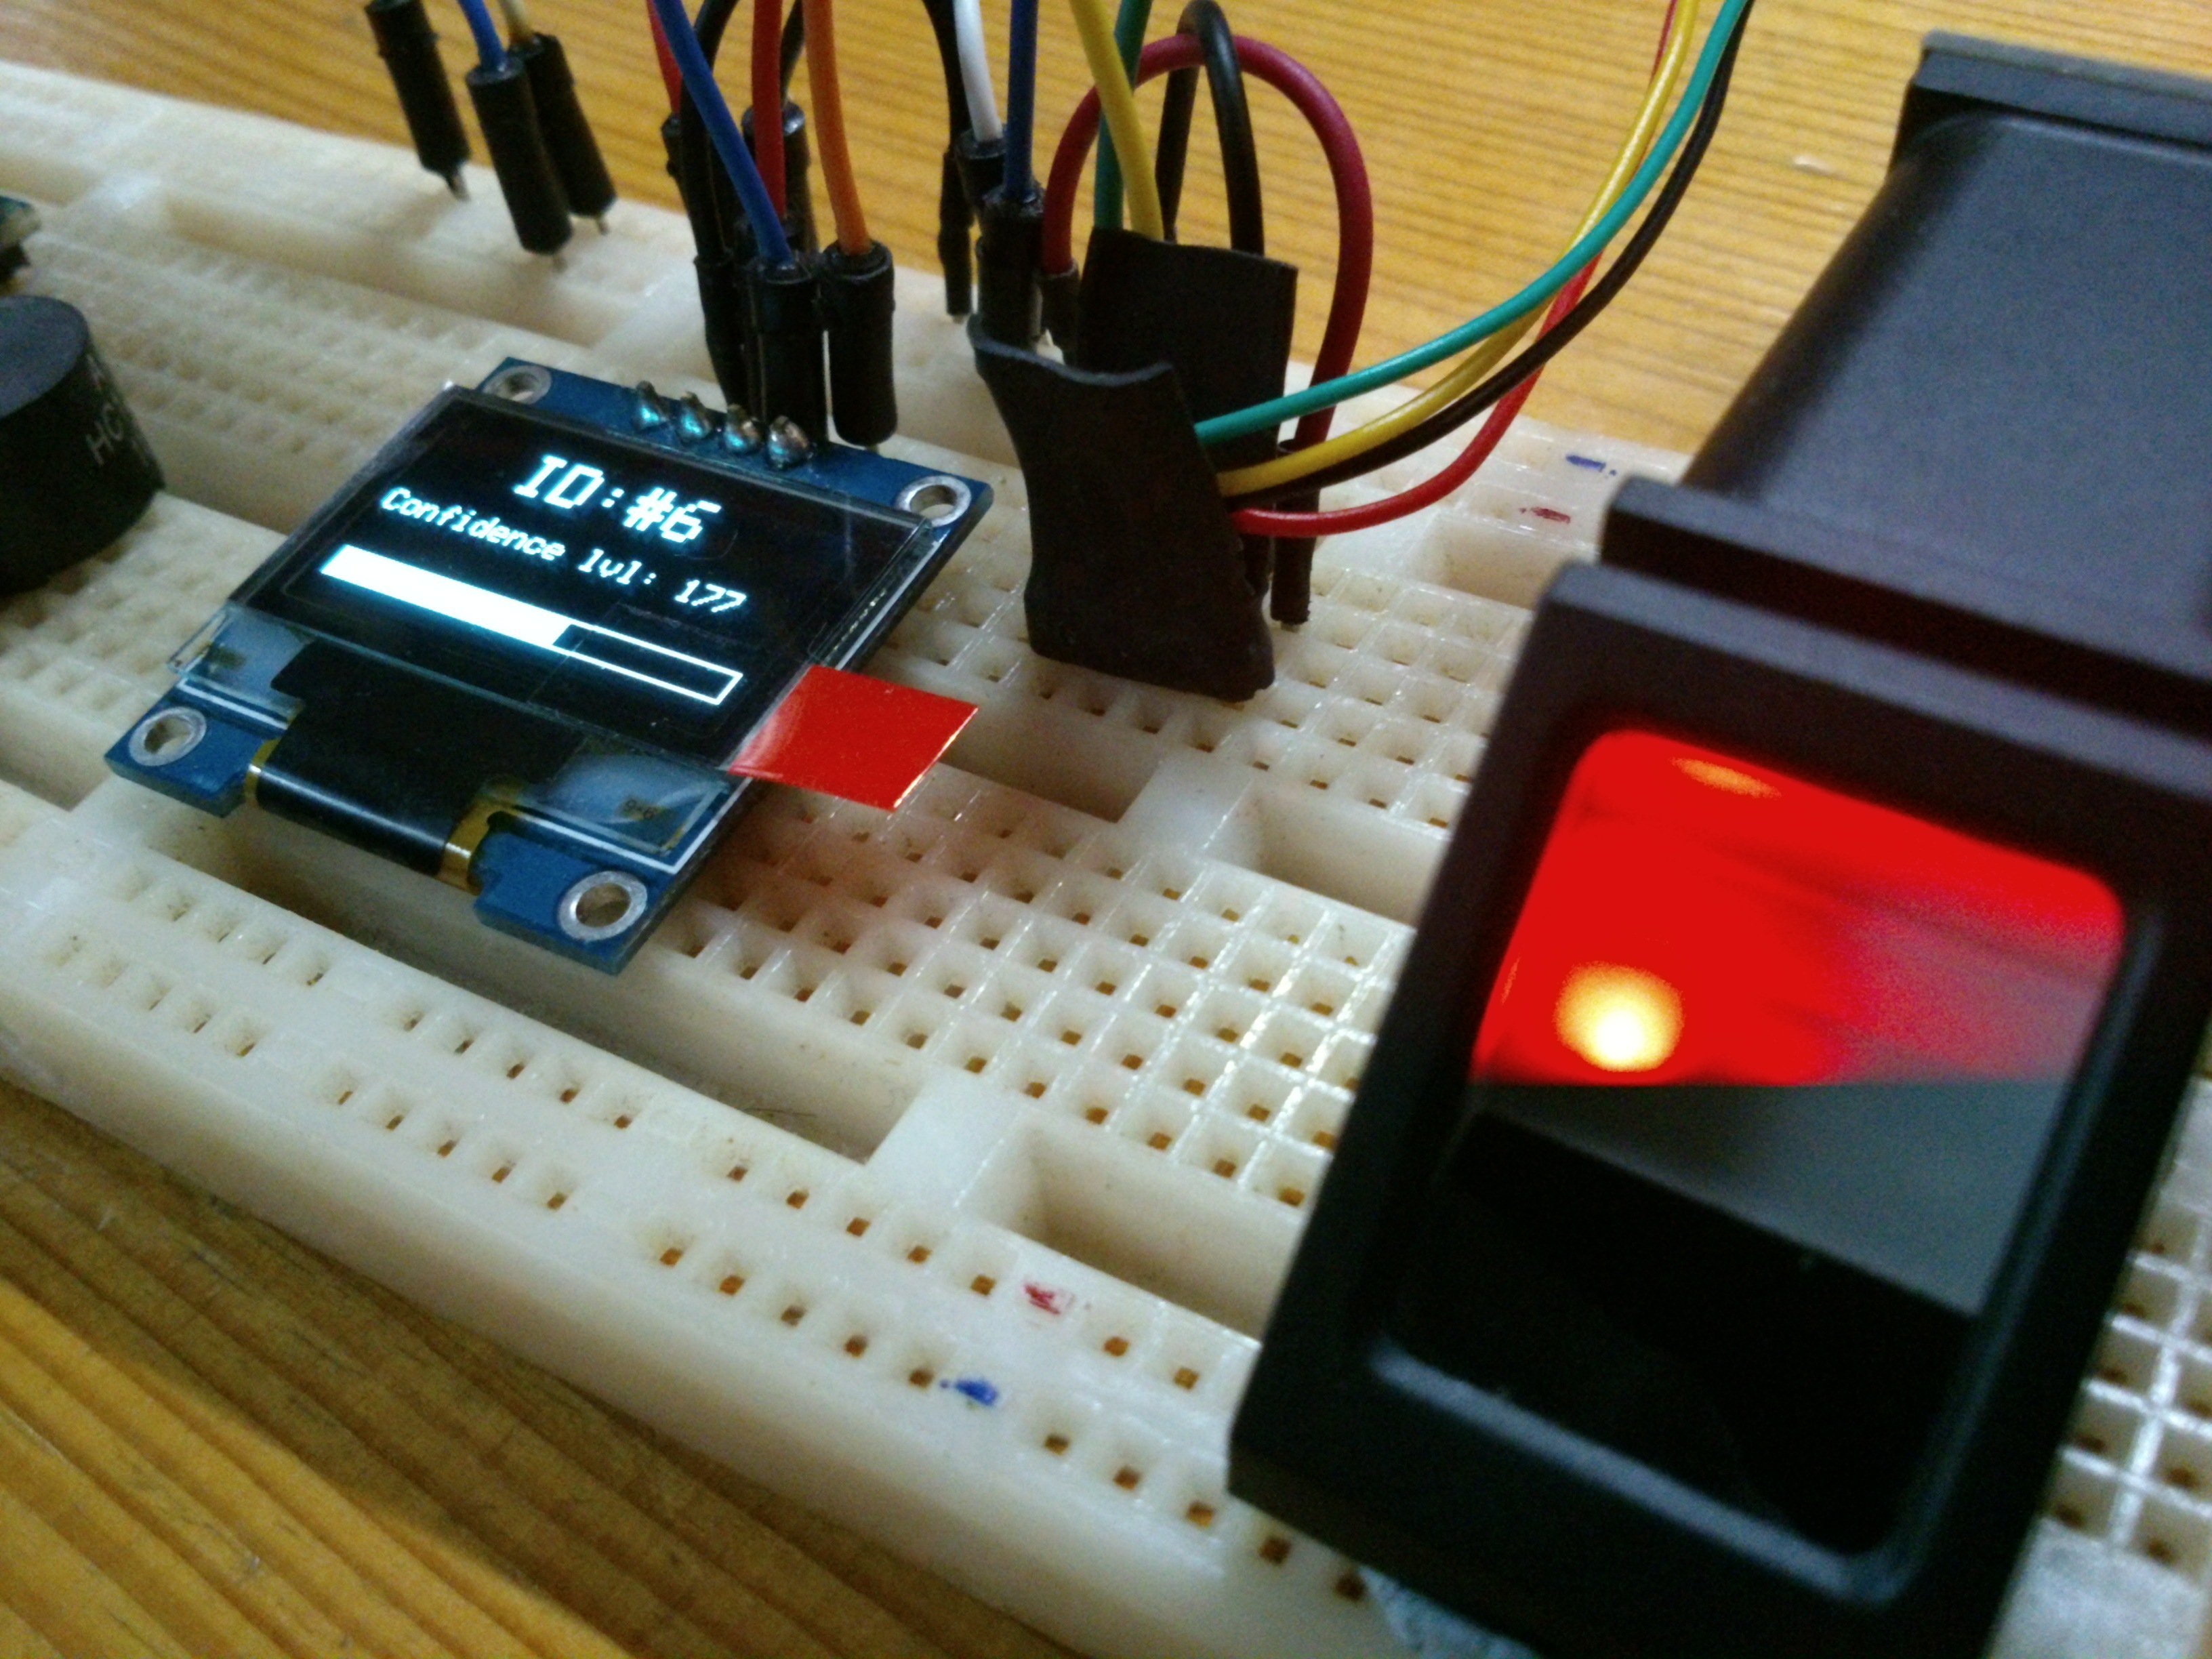
In this tutorial, I’ll be making a simple device that will make certain sound when fingerprints are detected. An small screen will be used to display the ID and the confidence level of the fingerprint, and a buzzer will be used to make 2 different tones for certain range of fingerprint confidence, which will be determined by the threshold value.
Demo
Gallery
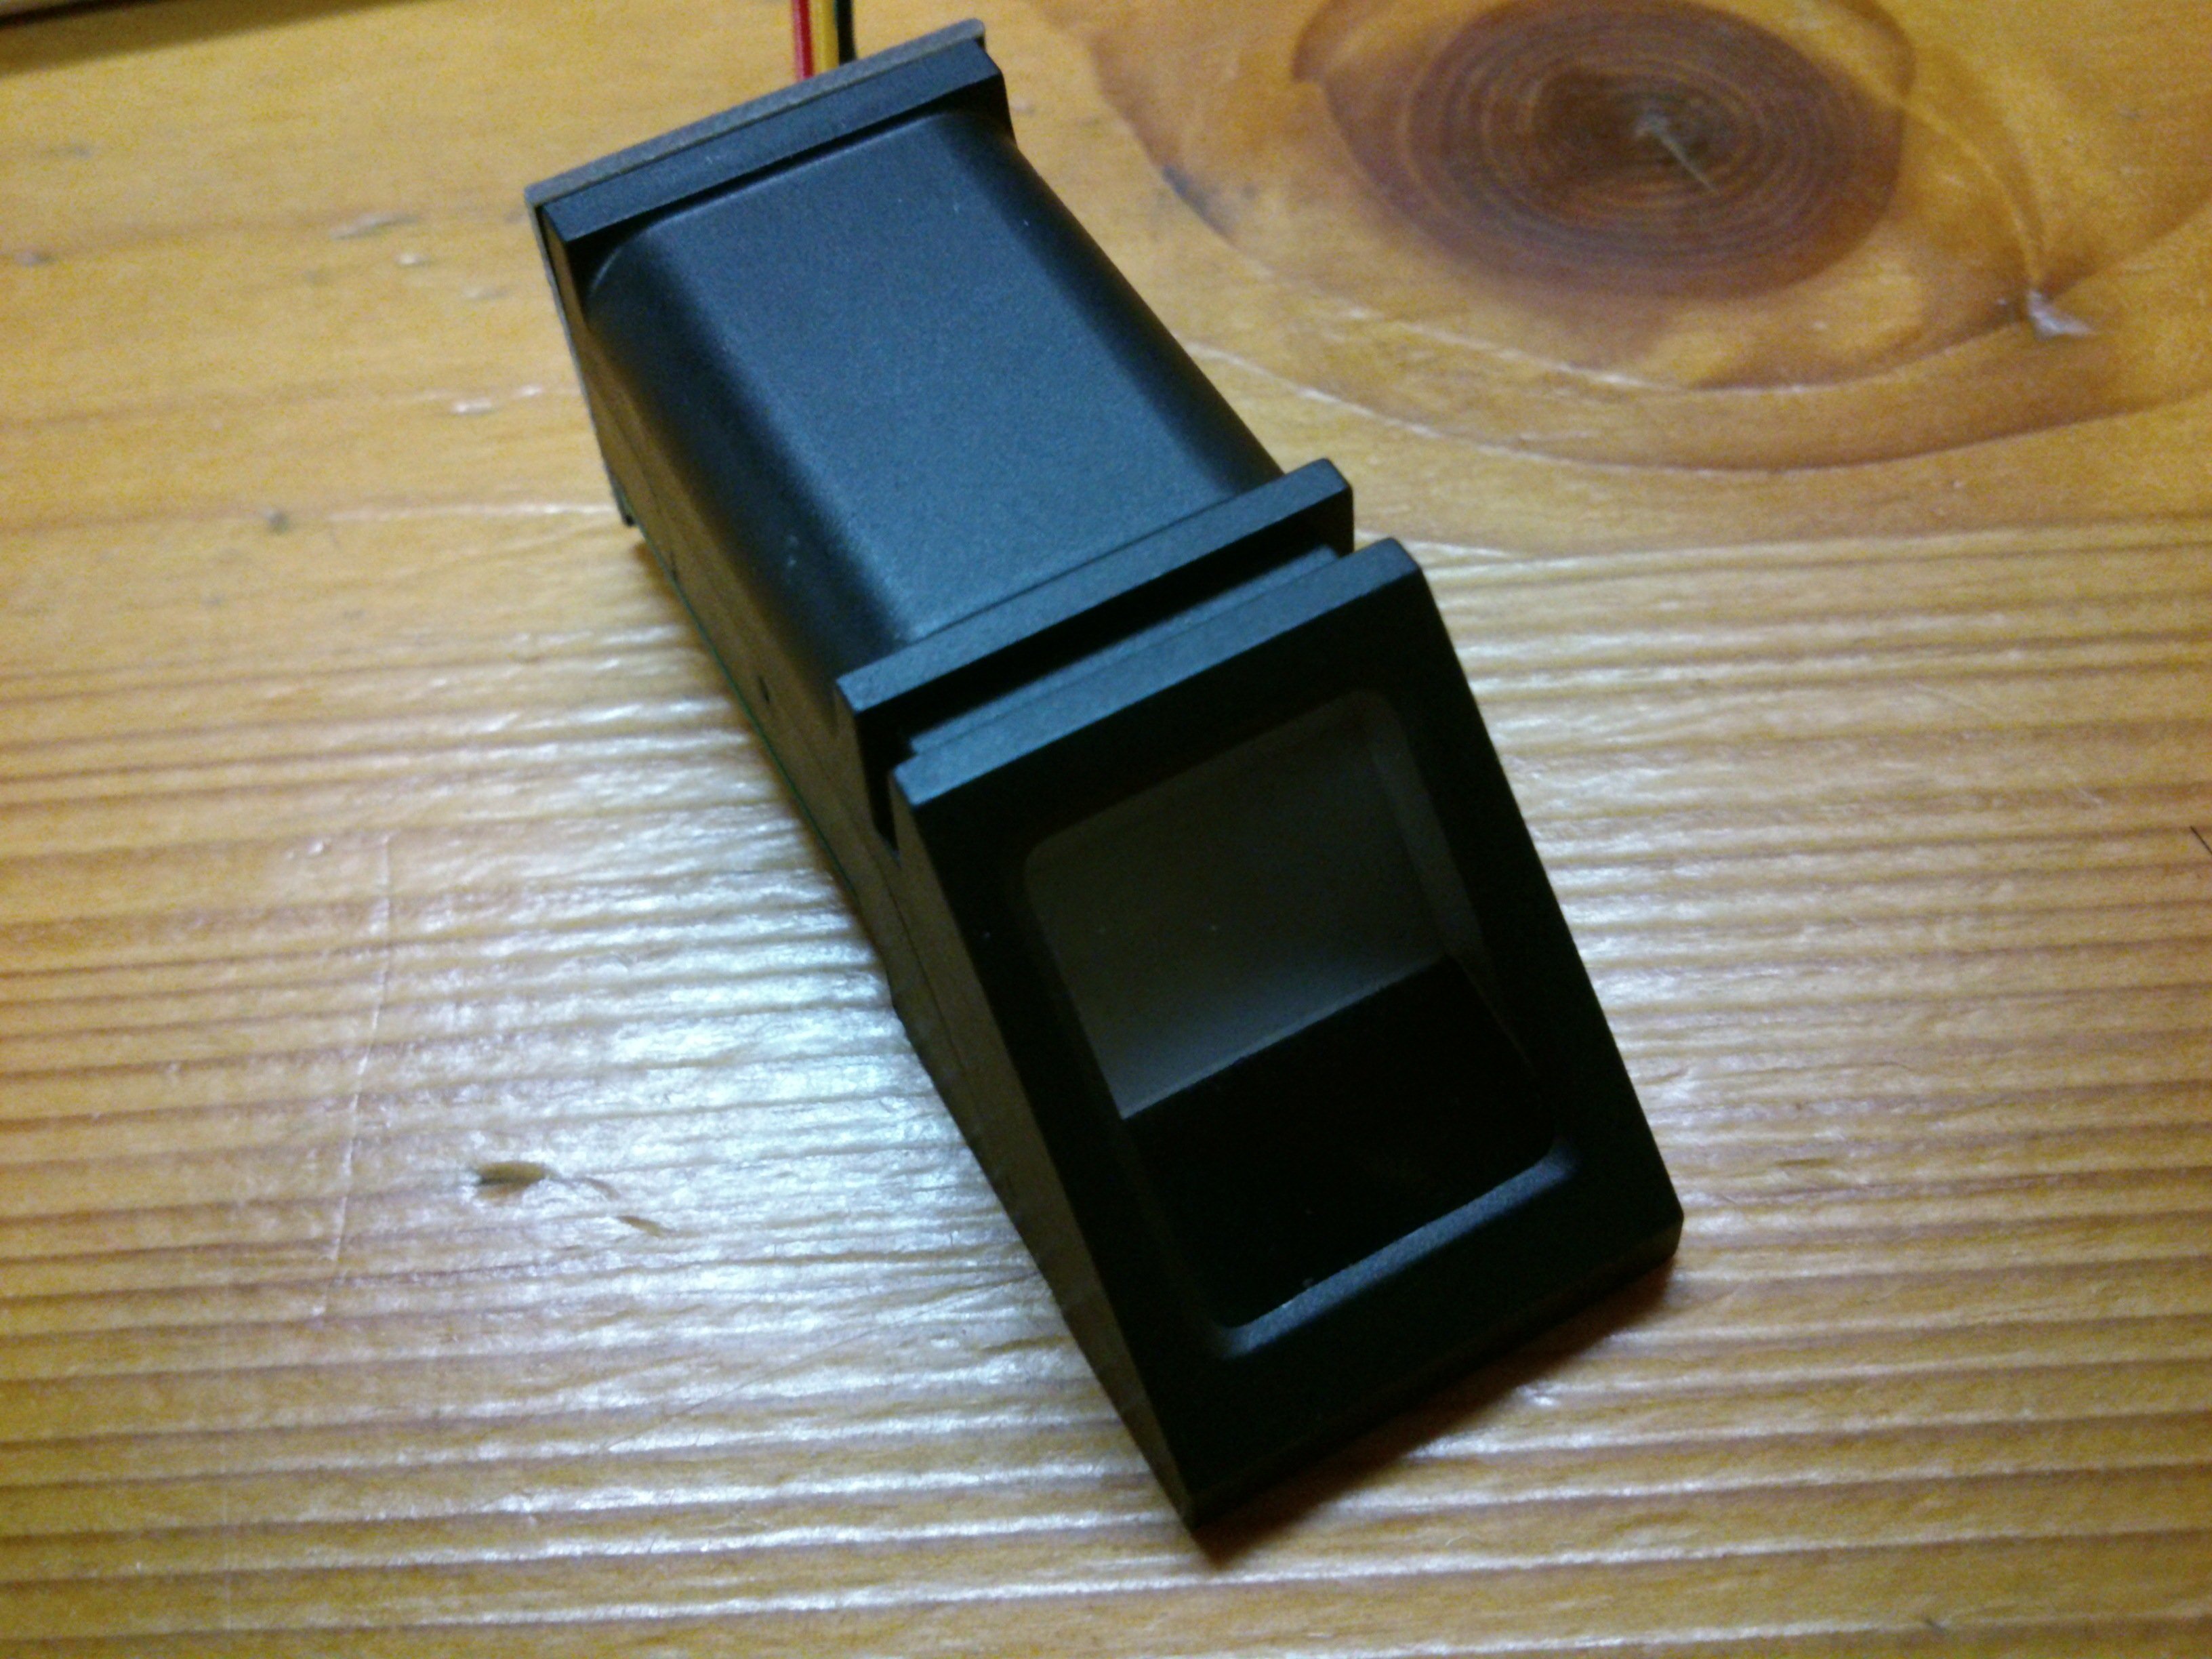
Here are some photos on what the circuit will look like:


Parts required
We’ll be using the Arduino Nano in this tutorial. Alternatively, you can also choose to use the Arduino Uno instead if you not have an Uno.
- Arduino Nano x 1
- Fingerprint Sensor Module x 1
- 0.96″ I2C OLED Screen x 1
- Buzzer x 1
- Jumper wires
- Breadboard x 1
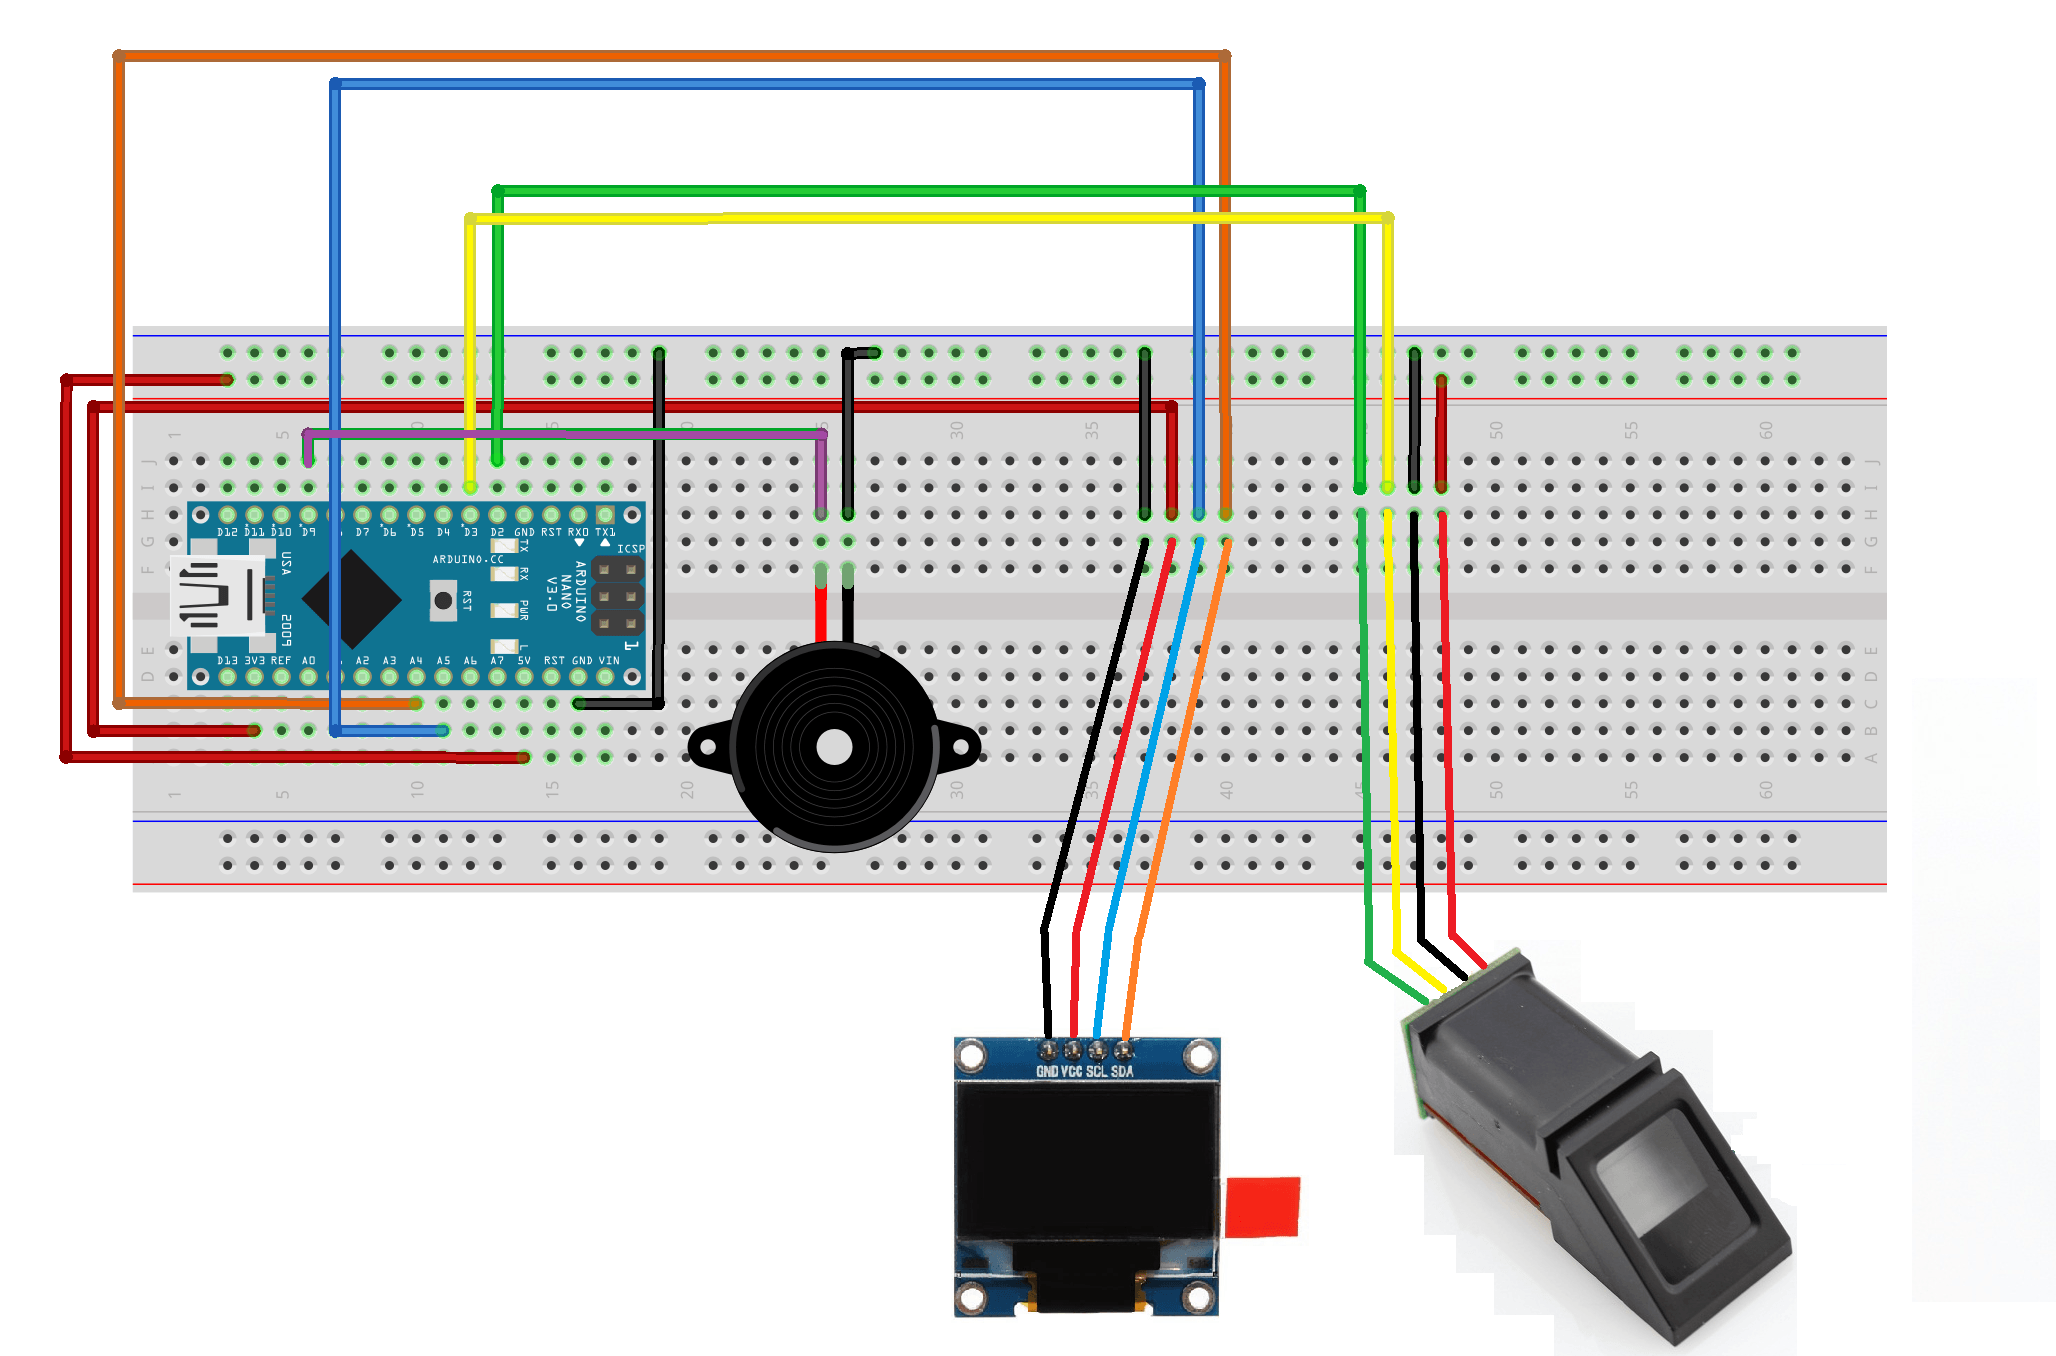
Schematics
This is the schematics of the project. The buzzer will be connected to digital pin D9, the OLED screen to A4 (SDA) & A5 (SCL) respectively, and lastly the fingerprint sensor to digital pins D2 & D3. The OLED will have a 3.3V input, whereas the fingerprint sensor module will have a 5V input.
Libraries
![]()
Before starting, we have to download the Adafuit fingerprint library. Download it here. Extract the zip and rename the file as “Adafruit_Fingerprint_Sensor_Library” instead of the default “Adafruit-Fingerprint-Sensor-Library” (As the arduino library do not allow library name with hyphens). Copy the entire file to your Arduino Library directory. (Should be located in your Program Files directory)
Enrolling your fingerprint
Before starting the verification of your fingerprints, you have to register them first. To do that, open the “enroll” example from the Adafruit Fingerprint library. This program will register your fingerprint to the sensor’s database.
[File > Example > Adafruit_Fingerprint_Sensor_Library> Enroll]
Upload this program into the Arduino. When the upload is completed, open the Serial Monitor. It should display “Type in the ID # you want to save this finger as…” after the sensor is detected. [ Having problem detecting the sensor? Please refer to the troubleshooting section. ]
We will be registering the right thumb as ID #1, so type in 1 in the Serial monitor & hit enter. The Serial Monitor should now display “Enrolling ID #1, Waiting for valid finger to …..”. Follow the instructions on the monitor. Once done, open the “fingerprint” example from the Adafruit Fingerprint library to test the sensor.
Testing the Sensor
Upload the “fingerprint” sketch & open the Serial Monitor. When it displays “Waiting for valid finger…”, place your thumb on the sensor & the ID of the finger print will be displayed. The level of confidence will also be displayed. What does the level of Confidence represents? It actually represents how much does your current fingerprint “match” to the one recorded in the sensor database. [Having problem detecting the sensor? Please refer to the troubleshooting section.]
Arduino Code – The main one
After all the testing is done, let’s move on to the main code of the project. Copy the following code & upload it to your Arduino. We’ll be setting a threshold for the confidence level of the sensor, which will cause the buzzer to either play the ”Valid fingerprint’ tone, or the ‘invalid fingerprint’ tone. The threshold variable will have a default value of 100, you can change it accordingly if you want to.
//For fingerprint sensor
#include <Adafruit_Fingerprint.h>
#include <SoftwareSerial.h>

//For Display
#include <SPI.h>
#include <Wire.h>
#include <Adafruit_GFX.h>
#include <Adafruit_SSD1306.h>

#define OLED_RESET 4

#if (SSD1306_LCDHEIGHT != 64)
#error("Height incorrect, please fix Adafruit_SSD1306.h!");
#endif

Adafruit_SSD1306 display(OLED_RESET);

//Buzzer
const int bzPin = 9;           // Buzzer pin

//LED
const int led = 13;

//Threshold limit for different sound (Valid & invalid sound)
const int threshld = 100;

//Fingerprint sensor
int getFingerprintIDez();

// pin #2 is IN from sensor (GREEN wire)
// pin #3 is OUT from arduino  (WHITE wire)
SoftwareSerial mySerial(2, 3);

Adafruit_Fingerprint finger = Adafruit_Fingerprint(&mySerial);

void buzz(boolean valid){
  if(valid){
    tone(bzPin, 523, 200);  //Note C5, Valid tone
  }
  else if(!valid){
    tone(bzPin, 123, 600);  //Note B2, Invalid tone
  }
}


void setup()
{
  Serial.begin(9600);

  //LED
  pinMode(led,OUTPUT);

  //Display
  display.begin(SSD1306_SWITCHCAPVCC, 0x3C);  // initialize with the I2C addr 0x3D (for the 128x64). Change address from 0x3D to 0x3C
  display.clearDisplay();
  //Text
  display.setTextSize(1);
  display.setTextColor(WHITE);
  display.setCursor(0,20);
  display.println("Fingerprint Sensor nv1.0");
  display.display();
  delay(500);

  //Set the data rate for the sensor serial port
  finger.begin(57600);

  if (finger.verifyPassword()) {
    display.println("> Found sensor!");
  }
  else {
    display.println("> Did not find sensor. Please reset...");
    while (1);
  }
  display.display();
  delay(100);
  digitalWrite(led,HIGH);
  delay(100);
  display.clearDisplay();
  display.setCursor(0,20);
  display.println("> Waiting for valid nfinger...");
  display.display();
  digitalWrite(led,LOW);
  delay(100);

  /*
  uint8_t templateBuffer[64];

   //dump entire templateBuffer.  This prints out 16 lines of 16 bytes
   for (int count= 0; count < 64; count++)
   {
   unsigned char PROGMEM img_bmp[] = {
   };
   for (int i = 0; i < 8; i++)
   {
   String temp = String("0x");
   temp += String(templateBuffer[count*1+i], HEX);
   temp += String(", ");
   img_bmp[count] = (unsigned char)atoi(temp.c_str());
   }
   // Serial.println();
   display.drawBitmap(0, 0,  img_bmp, 256,count+1, 1);
   display.display();
   delay(10);
   }
   */
}

void loop()                     // run over and over again
{
  //getFingerprintID();
  if(getFingerprintID()>=threshld)
  {
    buzz(true);  //buzz
  }
  delay(50);            //don't ned to run this at full speed.
}

// returns -1 if failed, otherwise returns ID #
int getFingerprintID() {
  uint8_t p = finger.getImage();
  if (p != FINGERPRINT_OK)  return -1;

  p = finger.image2Tz();
  if (p != FINGERPRINT_OK)  return -1;

  p = finger.fingerFastSearch();
  if (p != FINGERPRINT_OK)  return -1;

  // found a match!
  display.clearDisplay();
  display.setCursor(30,2);
  display.setTextSize(2);
  display.print("ID:#");
  display.println(finger.fingerID);
  display.setTextSize(1);
  display.print("nConfidence lvl: ");
  display.println(finger.confidence);
  drawBar(finger.confidence);
  display.display();
  delay(100);

  if(finger.confidence<threshld)
    buzz(false);
  return finger.confidence;

}

void drawBar(int val){
  //Draw rect
  display.drawRect(2, display.height()*3/4, display.width()-2, display.height()*(3/4)+10, WHITE);

  //Draw filled rect
  display.fillRect(2, display.height()*3/4, display.width()*val/300, display.height()*(3/4)+10, WHITE);

}
Troubleshooting
Having problems with the sensor? Below are some solution that can hopefully resolve your problems. If you still have any questions, feel free to ask it at the comments section.
“Did not find fingerprint sensor :(“
Double check all your connections of the Fingerprint sensor. Did you connect the green & yellow wire wrongly? You may have swapped the wire around & connected it to the wrong pins.
There is no light from the sensor!
Check your breadboard connections. Did you connect the 5V wire of the sensor to the terminal rail? Or have you forgotten to connect the terminal rail to the Arduino’s 5V pin?
The OLED display is not displaying anything!
Try resetting the Arduino by pressing the reset button & see whether anything appears. If not, check your SDA & SCL connections. Have you accidentally swapped it around? Double check your connections with the schematics above. After there is still nothing, check whether you have connected the display to the 3.3V pin or the ground pin.