
Contents
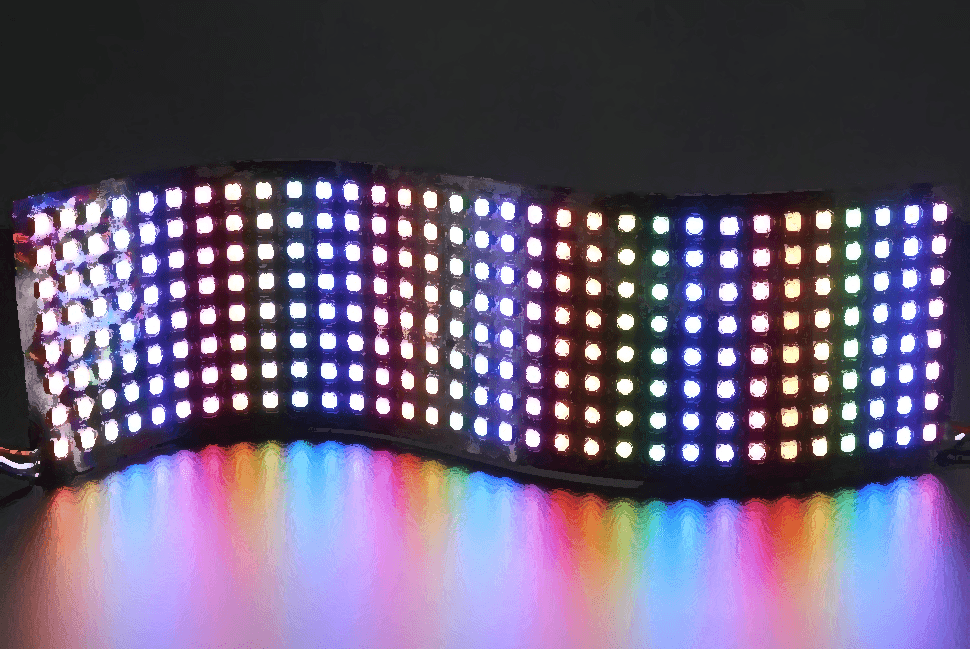
Needed a way to display scrolling text or messages? This Flexible 32×8 RGB LED Matrix display may suit your needs! With 256 LEDs on it, you can display text, patterns or even animation if you want to. Therefore, in this tutorial, you’ll be learning how to interface this display with an Arduino.
Overview

Basically, this display is made up of 32 x 8 = 256 LEDs & it is powered by a ws2811 driver, which makes it easier to control (or address) all of the 256 RGB LEDs. It uses a single wire control protocol: which means that we only need one wire to transmit the data into the RGB LED matrix display.
There are actually various arduino libraries available that can be used to control this matrix (such as the FastLED library), but in this tutorial, I’ll be using Adafruit Libraries.
![]()
Parts required
- Arduino Uno x 1
- 32×8 RGB LED Matrix x 1
- Jumper wires x 3
Demo
Setup
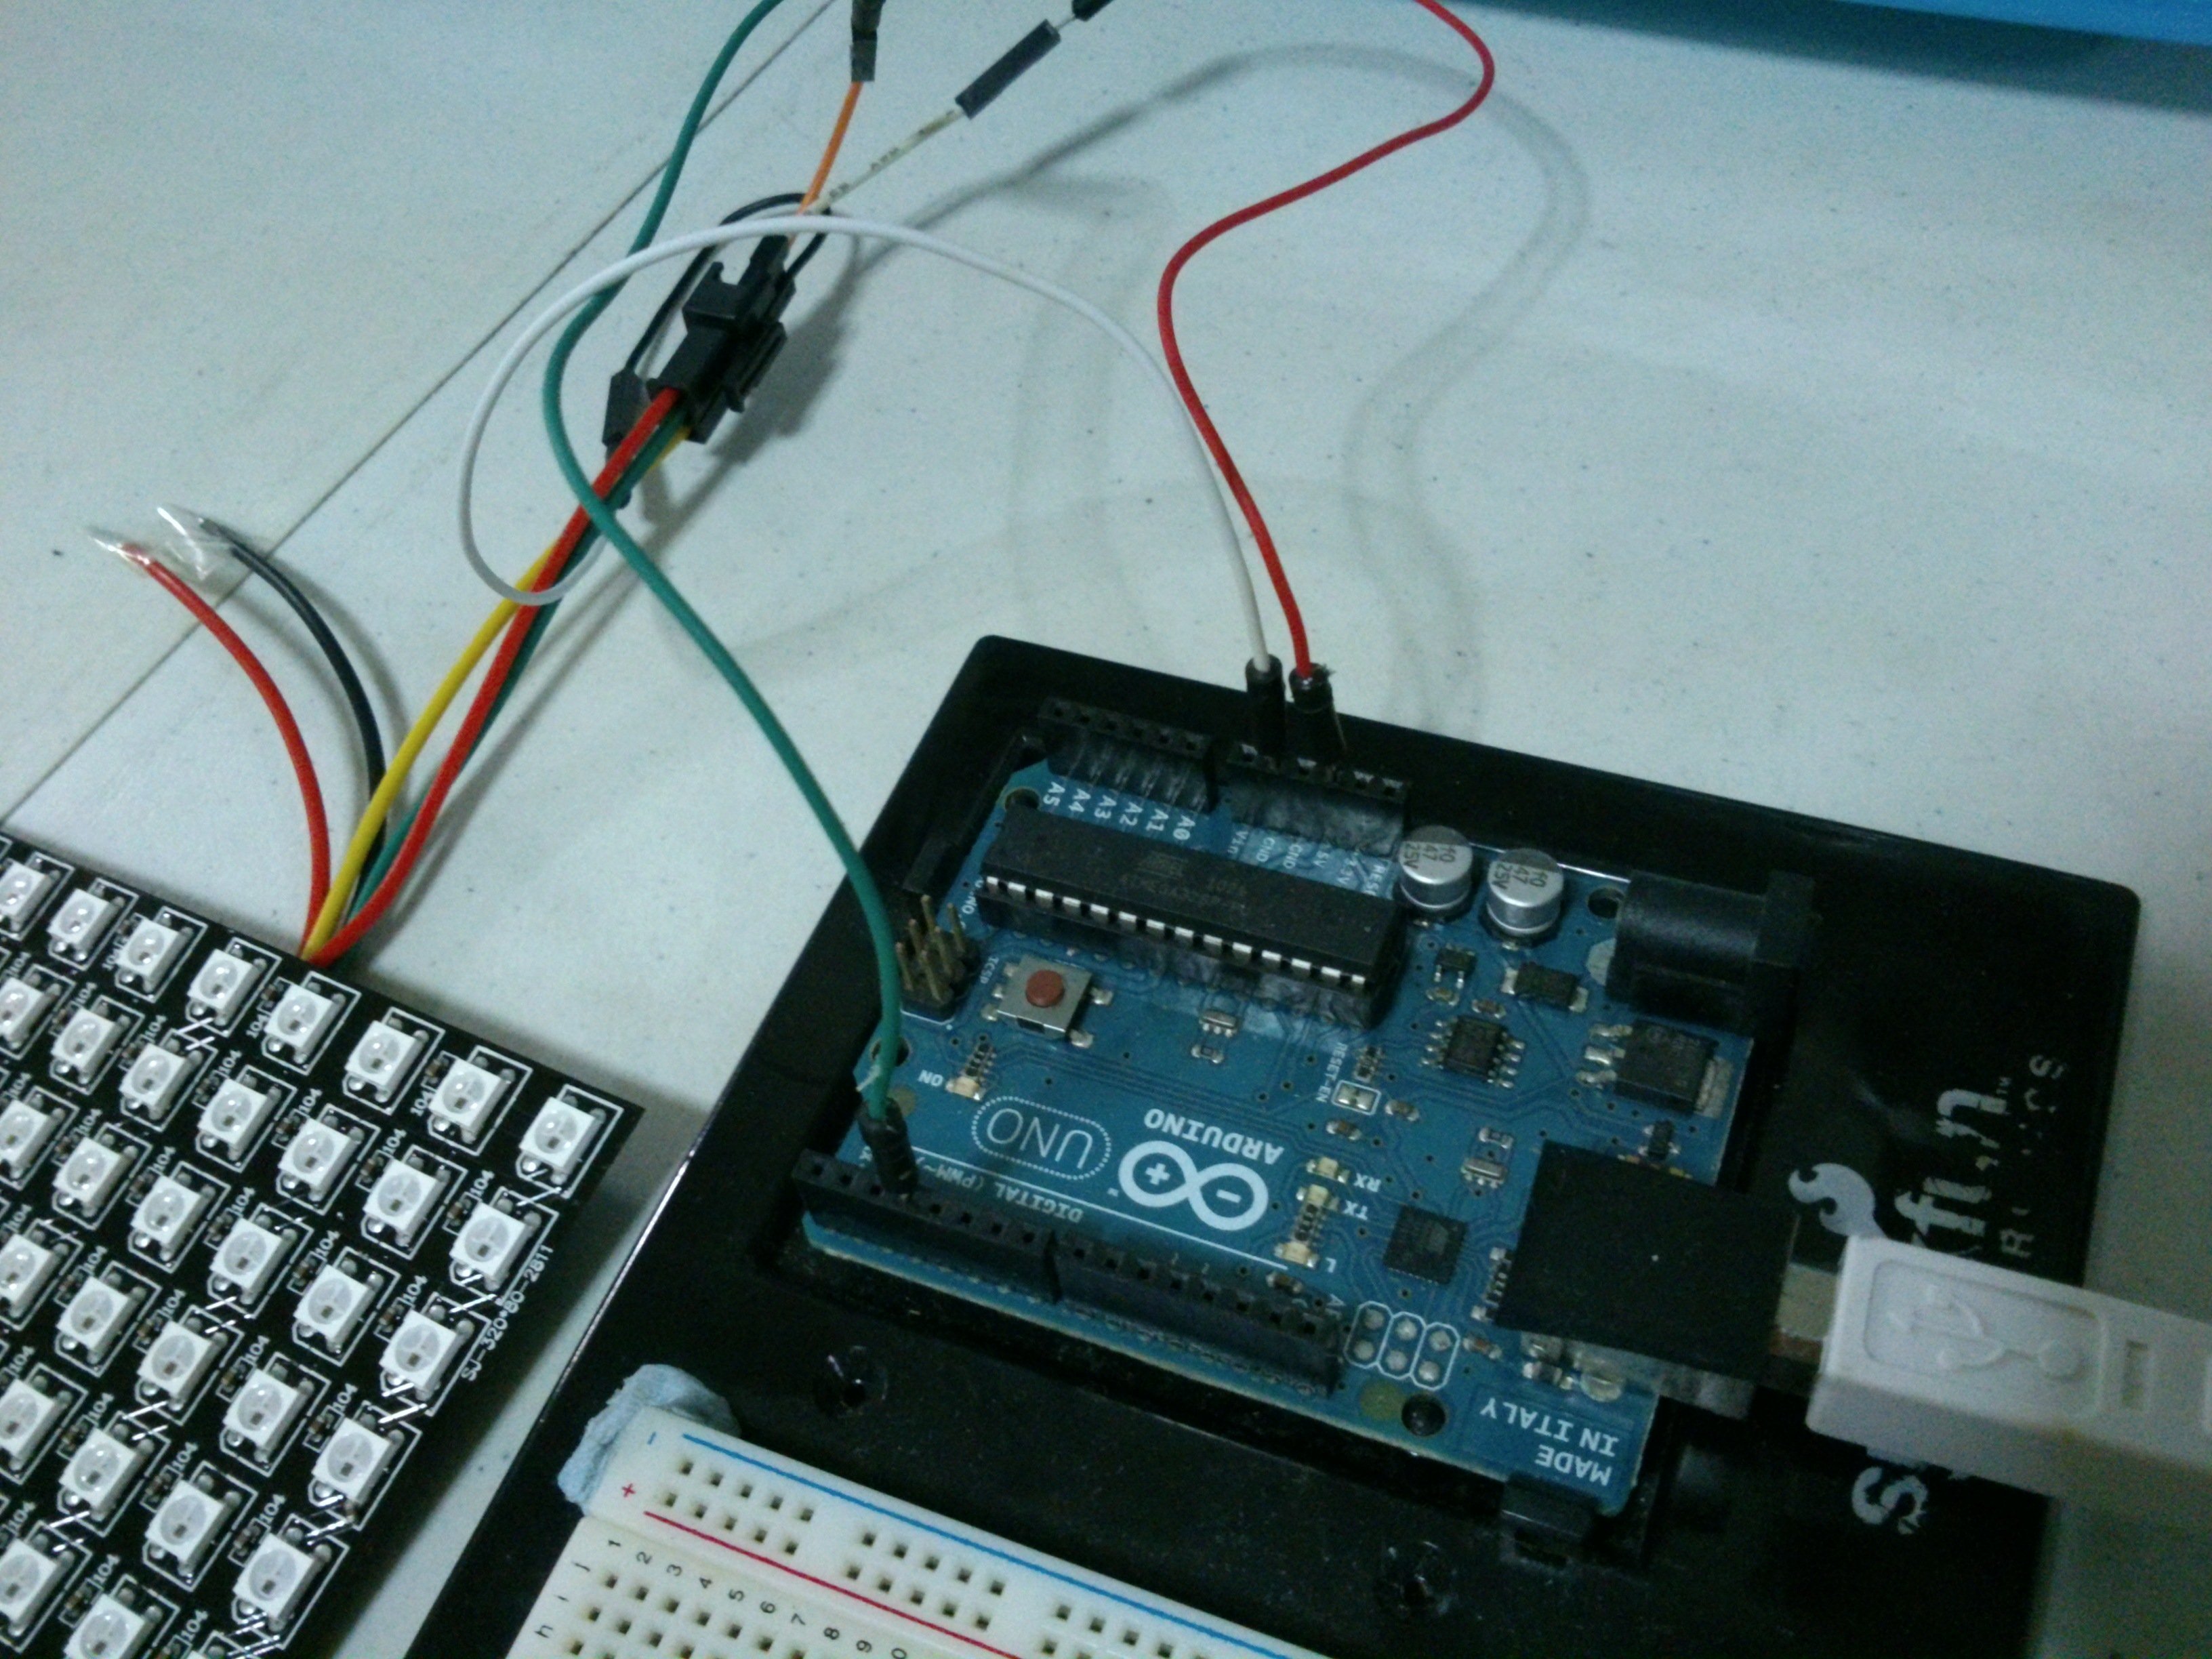
There are 3 main wires connecting the RGB matrix: Red, Green & Yellow. The red one is power line (+5V), green is data line & yellow is ground. Connect the red wire to the 5V pin, green wire to digital pin D3 & the yellow wire to ground using female to male jumper wires.
Testing the LEDs
Now that the wires are connected to the board, we will first test out all the LEDs to make sure that they are all working. Before that, download Adafruit’s NeoPixel library here: https://github.com/adafruit/Adafruit_NeoPixel. After installing the library into the Arduino’s library directory, copy the following code & upload it to the Arduino:
#include <Adafruit_NeoPixel.h>
#include <avr/power.h>

#define PIN            3      //Data pin

// How many NeoPixels are attached to the Arduino?
#define NUMPIXELS      256

// When we setup the NeoPixel library, we tell it how many pixels, and which pin to use to send signals.
// Note that for older NeoPixel strips you might need to change the third parameter--see the strandtest
// example for more information on possible values.
Adafruit_NeoPixel pixels = Adafruit_NeoPixel(NUMPIXELS, PIN, NEO_GRB + NEO_KHZ800);

int delayval = 500; // delay for half a second

void setup() {
  pixels.begin(); // This initializes the NeoPixel library.
}

void loop() {
  // For a set of NeoPixels the first NeoPixel is 0, second is 1, all the way up to the count of pixels minus one.

  for(int i=0;i<NUMPIXELS;i++){

    // pixels.Color takes RGB values, from 0,0,0 up to 255,255,255
    pixels.setPixelColor(i, pixels.Color(0,150,0)); // Moderately bright green color.

    pixels.show(); // This sends the updated pixel color to the hardware.

    delay(delayval); // Delay for a period of time (in milliseconds).
    pixels.clear();
  }
}
After uploading, you should see the matrix turning on & off one at a time.
Scrolling the Text
After the testing is done, we move on to the ultimate part: scrolling text! To do that, we will first have to import some libraries:
Adafruit GFX Library: https://github.com/adafruit/Adafruit-GFX-Library
Adafruit NeoPixel Library: https://github.com/adafruit/Adafruit_NeoMatrix
For now, we would be scrolling test as the text in 7 different colors each round, but you can change it if you want. We would set the order to NEO_MATRIX_ZIGZAG, as the LEDs are connected in a “zigzag” manner. The code is as follows:
#include <Adafruit_GFX.h>
#include <Adafruit_NeoMatrix.h>
#include <Adafruit_NeoPixel.h>

#define PIN 3

// MATRIX DECLARATION:
// Parameter 1 = width of NeoPixel matrix
// Parameter 2 = height of matrix
// Parameter 3 = pin number (most are valid)
// Parameter 4 = matrix layout flags, add together as needed:
//   NEO_MATRIX_TOP, NEO_MATRIX_BOTTOM, NEO_MATRIX_LEFT, NEO_MATRIX_RIGHT:
//     Position of the FIRST LED in the matrix; pick two, e.g.
//     NEO_MATRIX_TOP + NEO_MATRIX_LEFT for the top-left corner.
//   NEO_MATRIX_ROWS, NEO_MATRIX_COLUMNS: LEDs are arranged in horizontal
//     rows or in vertical columns, respectively; pick one or the other.
//   NEO_MATRIX_PROGRESSIVE, NEO_MATRIX_ZIGZAG: all rows/columns proceed
//     in the same order, or alternate lines reverse direction; pick one.
//   See example below for these values in action.
// Parameter 5 = pixel type flags, add together as needed:
//   NEO_KHZ800  800 KHz bitstream (most NeoPixel products w/WS2812 LEDs)
//   NEO_KHZ400  400 KHz (classic 'v1' (not v2) FLORA pixels, WS2811 drivers)
//   NEO_GRB     Pixels are wired for GRB bitstream (most NeoPixel products)
//   NEO_RGB     Pixels are wired for RGB bitstream (v1 FLORA pixels, not v2)

Adafruit_NeoMatrix matrix = Adafruit_NeoMatrix(32, 8, PIN,
  NEO_MATRIX_BOTTOM    + NEO_MATRIX_RIGHT +
  NEO_MATRIX_COLUMNS + NEO_MATRIX_ZIGZAG,
  NEO_GRB            + NEO_KHZ800);

const uint16_t colors[] = {
  matrix.Color(255, 0, 0), matrix.Color(0, 255, 0), matrix.Color(255, 255, 0),matrix.Color(0, 0, 255), matrix.Color(255, 0, 255), matrix.Color(0, 255, 255), matrix.Color(255, 255, 255)};

void setup() {
  matrix.begin();
  matrix.setTextWrap(false);
  matrix.setBrightness(5);
  matrix.setTextColor(colors[0]);
}

int x    = matrix.width();
int pass = 0;

void loop() {
  matrix.fillScreen(0);    //Turn off all the LEDs
  matrix.setCursor(x, 0);
  matrix.print(F("Test"));

  if( --x < -30 ) {
    x = matrix.width();

    if(++pass >= 8) pass = 0;
    matrix.setTextColor(colors[pass]);
  }
  matrix.show();
  delay(30);
}
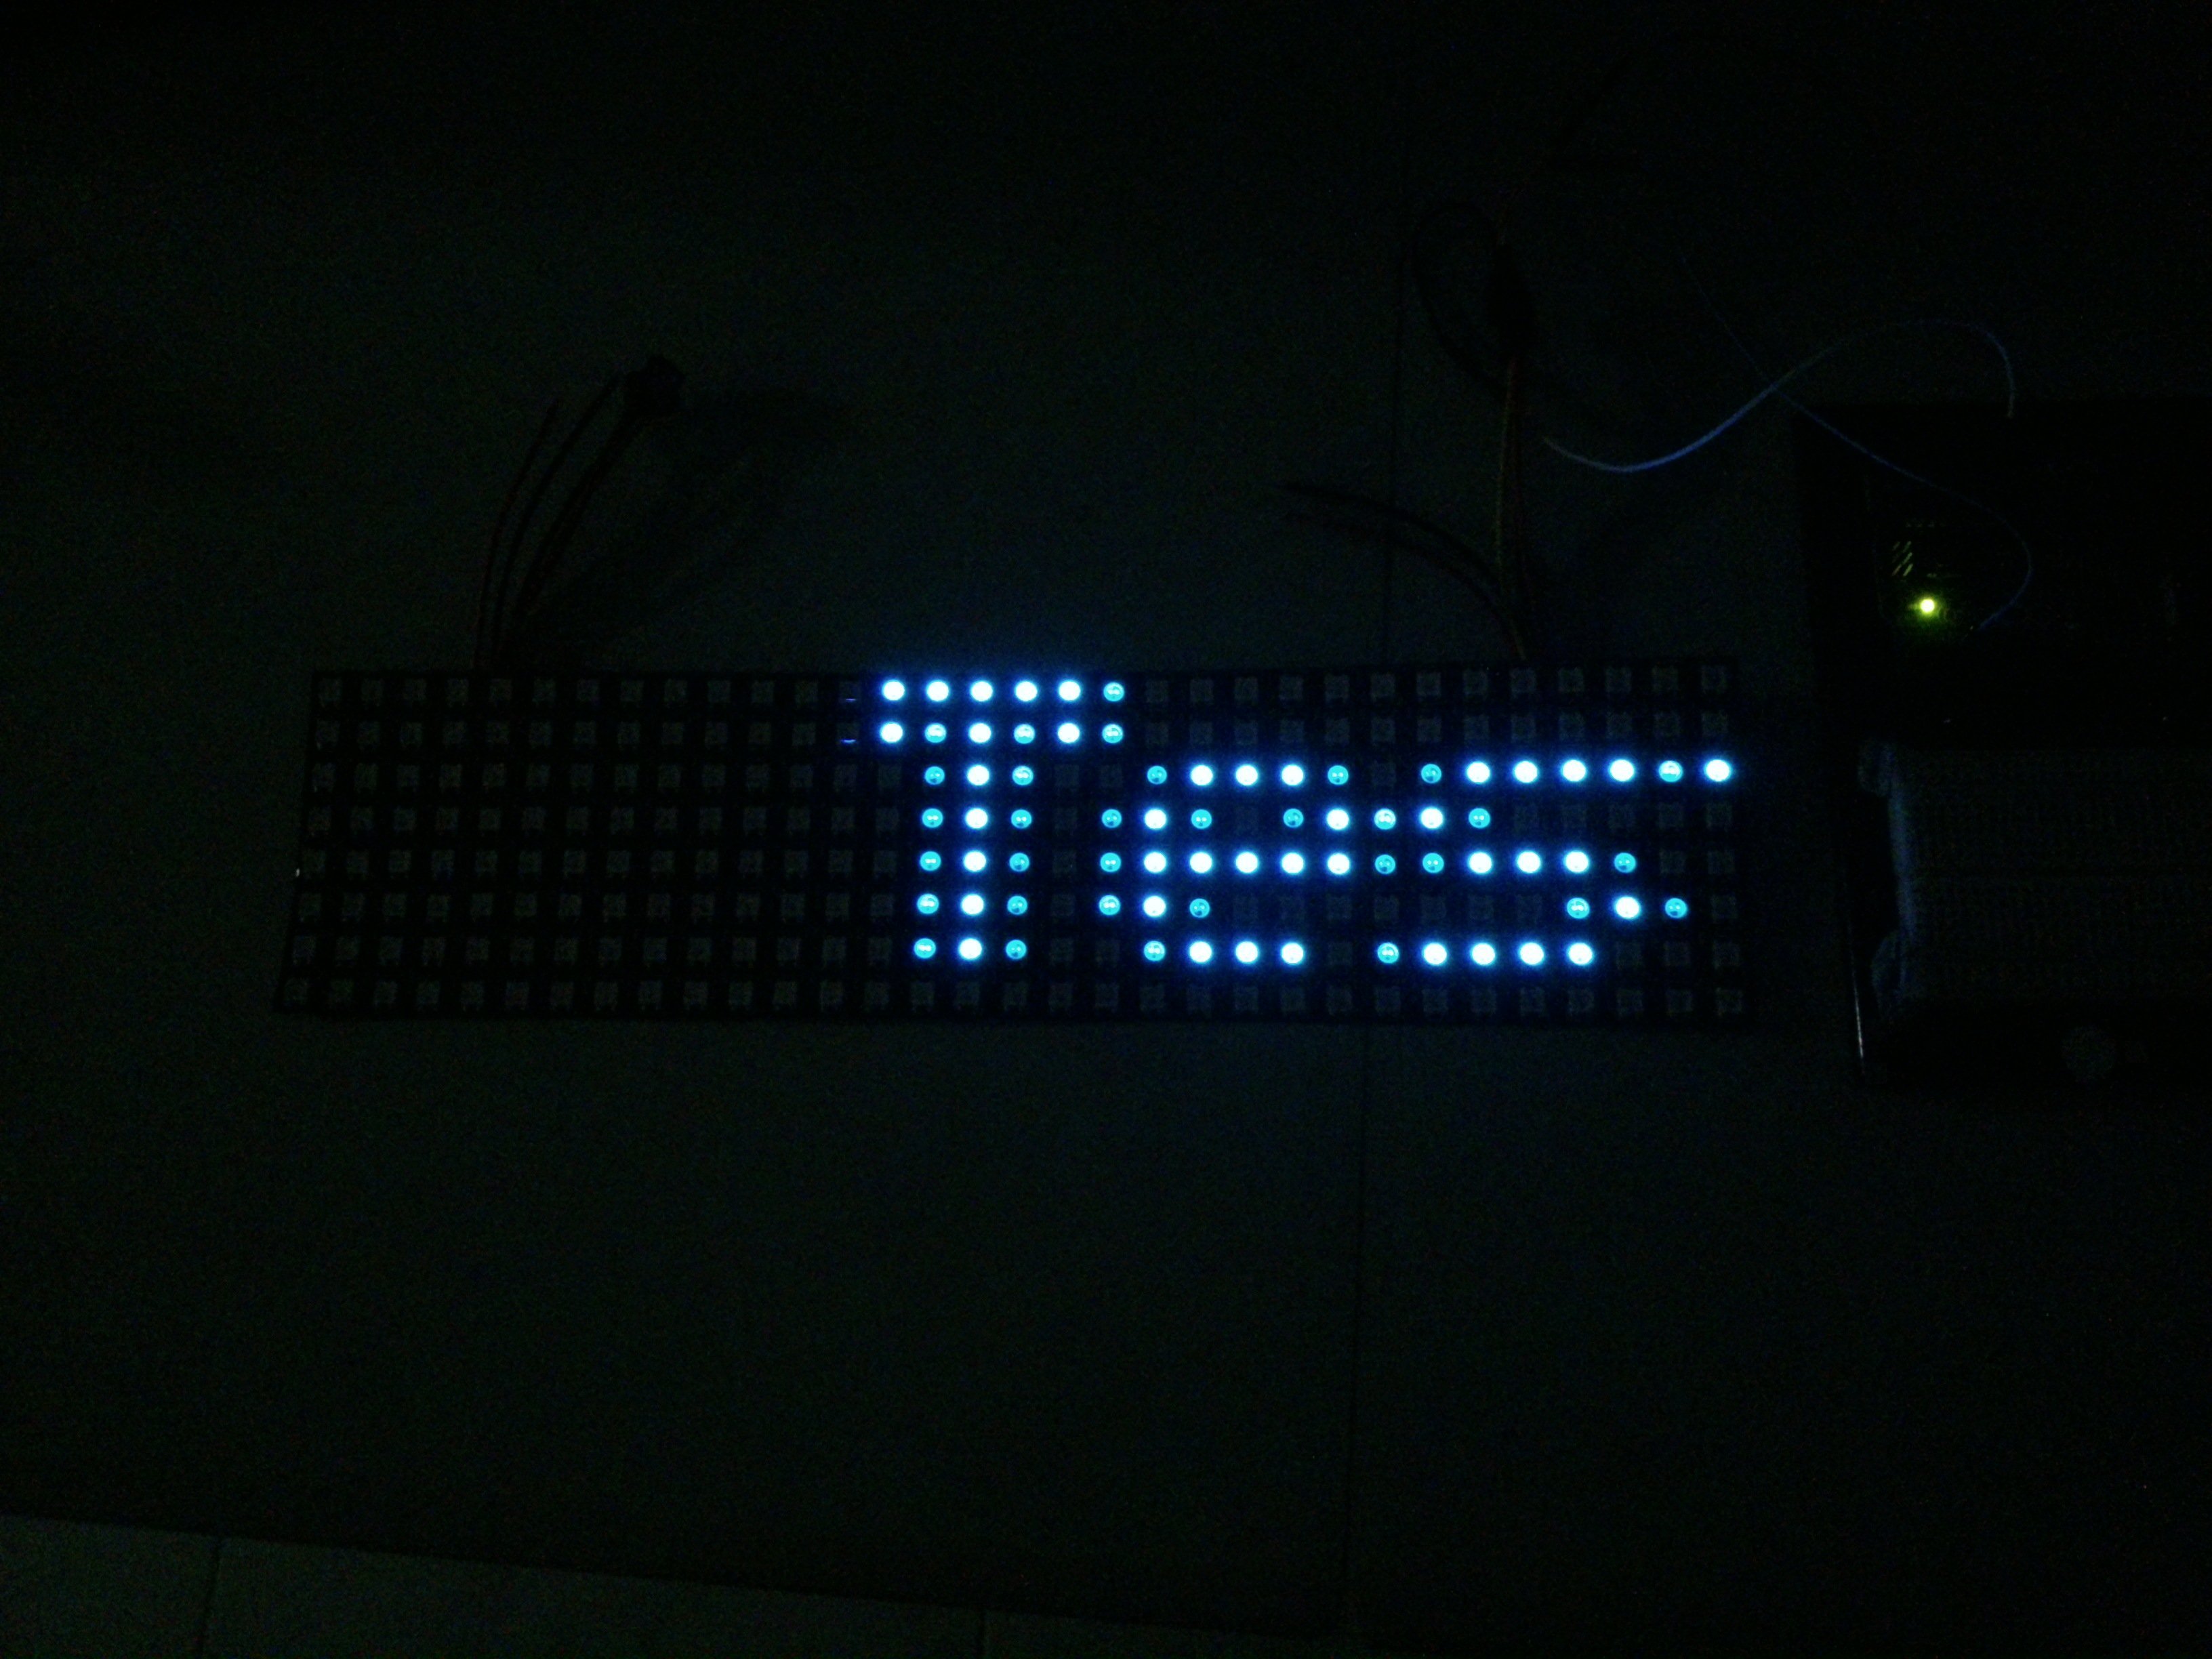
And after uploading the code, you should see test scrolling across the matrix!
Reference
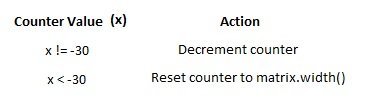
What does if( –x < -30 ) { …} represents?
The number 30 represents the reset counter offset for the position of the text. As the counter decrement every iteration, the if condition would be checked. When the counter reaches -30, the cursor value would reset to the right, which is the value of matrix.width(). (The counter offset value could vary depending on the length of the text.)


Good work. A few things. (1) use of number 30, it will cut long strings. not sure why used? (2) colors used are primary, not exploring the rich color set.
I have a 16 x 16, but text is using only the half. matrix.setCursor(x, 8); is going to use bottom, but unable to use both. I may be missing something. can you please me what it is ?
Hi Kris,

(1) The number 30 represents the counter offset for the position of the text. When the counter reaches -30, the cursor value would reset to the right, which is the value of
matrix.width().(2) The arguments for function setCursor(x, y) sets the lower left text position of the cursor. Since a 16 x 16 matrix is used, the y-axis of setCursor should be set to 16 instead of 8.
setCursor(x,16)Hope this helps!
how do you change the what the screen says
It can be changed via the matrix.print() function.
How can you change the size of the text–> I want the matrix to be on two daisy chained 32 x 8 displays, but the matrix itself be 32 x 5. I tried changing the matrix height and such, but the leds didn’t continue to scroll normally
Hi Samantha,
The height argument in Adafruit_NeoMatrix during initialisation should have adjusted the text height, might be an issue with the starting point of the matrix.
Perhaps you can try changing NEO_MATRIX_BOTTOM to NEO_MATRIX_TOP, and see whether that works.
Hi Samantha!
Thank you for your small tutorial!
I have a CharlieWing Display and want to display an “endless” scrolling text made of “Temperatur = 23° Air humidity = 35%”. At the end of ‘…35%’ there should be a space and then the Temperatur should directly scroll in. Should look like this: “= 35% Temperature = 23° Air humidity = 35% Temperature = 23° Air humidity = 35% …” and so on. Is there an easy way to display it this way?
Hi Matthias, if the temperature and humidity is fixed, you can just “hard code” the text into the string. If it’s variable (assuming it’s getting data from a sensor), you can try using a string formatter like
sprintfto insert the variable values into the string before passing it tomatrix.print(), for example here.I finally got it to work on my two 16×16 thanks to your help. But I have a question: Can you tell me how to get the text in the middle? Now it only runs in the upper area. Would be really great of you, thanks.
Hi Domi,
You could try changing the height of the matrix during the neomatrix declaration.
Adafruit_NeoMatrix matrix = Adafruit_NeoMatrix(32, {set_height_here}, PIN,

  NEO_MATRIX_BOTTOM    + NEO_MATRIX_RIGHT +

  NEO_MATRIX_COLUMNS + NEO_MATRIX_ZIGZAG,

  NEO_GRB            + NEO_KHZ800);
Hi
Thanks for a super good article.
Can you make two text lines, one at the top and one at the bottom ??
And can you draw circles, triangles, etc.
How do you do it??
Thank you Happy Easter
Hi Henrik,
It should be possible to display 2 text lines without scrolling, depending on the setup you have. For drawing shapes, it should be possible as it is using the Adafruit GFX library (the neopixel matrix is like a huge low resolution screen), more information of the documentation could be found here: https://cdn-learn.adafruit.com/downloads/pdf/adafruit-gfx-graphics-library.pdf.
Hope this helps.
How can I slow the scroll speed down?
Hi Rebecca,
You can adjust the scrolling speed via the
delay()function. (Belowmatrix.show();)what is the way to have 2 matrix on one arduino?
Hi Erik, the matrix display would consists of 2 wires connected, one for the input and the other output. The second matrix could be daisy chained (connected) from the output wire of the 1st matrix display to the input wire of the second display. Take note of the direction and double check the connections before powering up the display.
For example, the connection would look something like this:
| | | | VCC --| IN OUT |-- --| IN OUT |-- VCC DAT --| 32 x 8 Matrix |-- --| 32 x 8 Matrix |-- DAT GND --| 1st Display |-- --| 2nd Display |-- GND | | | |Is there a way to make it become a count down timer?
Is there a way to make it become a count down timer from 9 to 0?
Hi Nicholas, it is possible to do so. You can create a timer via the
millis()function and an integer counter to decrement every second (or any other interval), and display the counter value on the matrix display via theprint()function. More information on the Adafruit Graphics library: https://learn.adafruit.com/adafruit-gfx-graphics-library/graphics-primitivesHi there, great project. I have constructed a matrix 47 pixels long by 12 pixels wide for a sign for our shop. i have got it working great but i cannot get the text more than 7 pixels wide. I have changed all the parameters to the correct values but it will not use more than 7 wide, 8 if you include the bottom of a comma which is 1 pixel below the letters. So is there a way to increase the size of the letters to utlize the 4 unused rows of pixels or are the letters only 7 pixels wide? also is there a way to shorten the time from when the last words ends, loops and starts again as it’s currently around 40 seconds of nothing before the text restarts. Thanks in advance.
Hi Paddy, you can try using the fonts available in the GFX library: https://learn.adafruit.com/adafruit-gfx-graphics-library/using-fonts
I want to scroll from left to right by default it’s right to left also I want to increase font width, I am using 48 x 8 matrix ws2812. Please advise
Hi Kumar,
– To increase the font size, you need to update the height value when creating the `Adafruit_NeoMatrix` object. For your case, it would be changing `Adafruit_NeoMatrix(32, 8, …` to `Adafruit_NeoMatrix(48, 8, …`.
– To change the direction, you can increment the x position instead of decrementing it (as the x variable represents the text position on the matrix display.) The code could look something like this:
int screen_offset = 30;       // We'll set a positive offset

x++;                          // Increment the position, which results in moving from left to right

if( x > screen_offset ) {     // Check if x is more than the set screen offset

    x = -matrix.width();      // We would reset the cursor to the length of the matrix (in negative) to hide the text.

    pass++;                   // Increment pass to change the color

    if (pass >= 8) {

      pass = 0;               // Reset pass if it is more than equal to 8

    }

    matrix.setTextColor(colors[pass]);

}
Hope this helps!